
How to add OBS as a Webcam Source in Zoom
You can use your webcam directly with Zoom without OBS, but you’ll be dealing with subpar image quality. This is because Zoom does not give you access to your webcam’s settings such as exposure and white balance. Nor does it let you add any filters like LUTs. This guide will teach you how to add OBS as as webcam in Zoom using OBS Virtual Camera.
Method 1 (new 2021 method)
With the latest version of OBS, you no longer need to download OBS-VirtualCam plugin. It works “out the box”. This technique also works with other streaming software that allows webcams to be added as a source such as Skype.
You will need:
-Open Broadcaster Software Studio (OBS)
-Zoom
Step 1: Update to the latest version of OBS Studio.
In the upper left of OBS, click Help > Check for Updates to update.

Step 2: Click Start Virtual Camera in the bottom right.

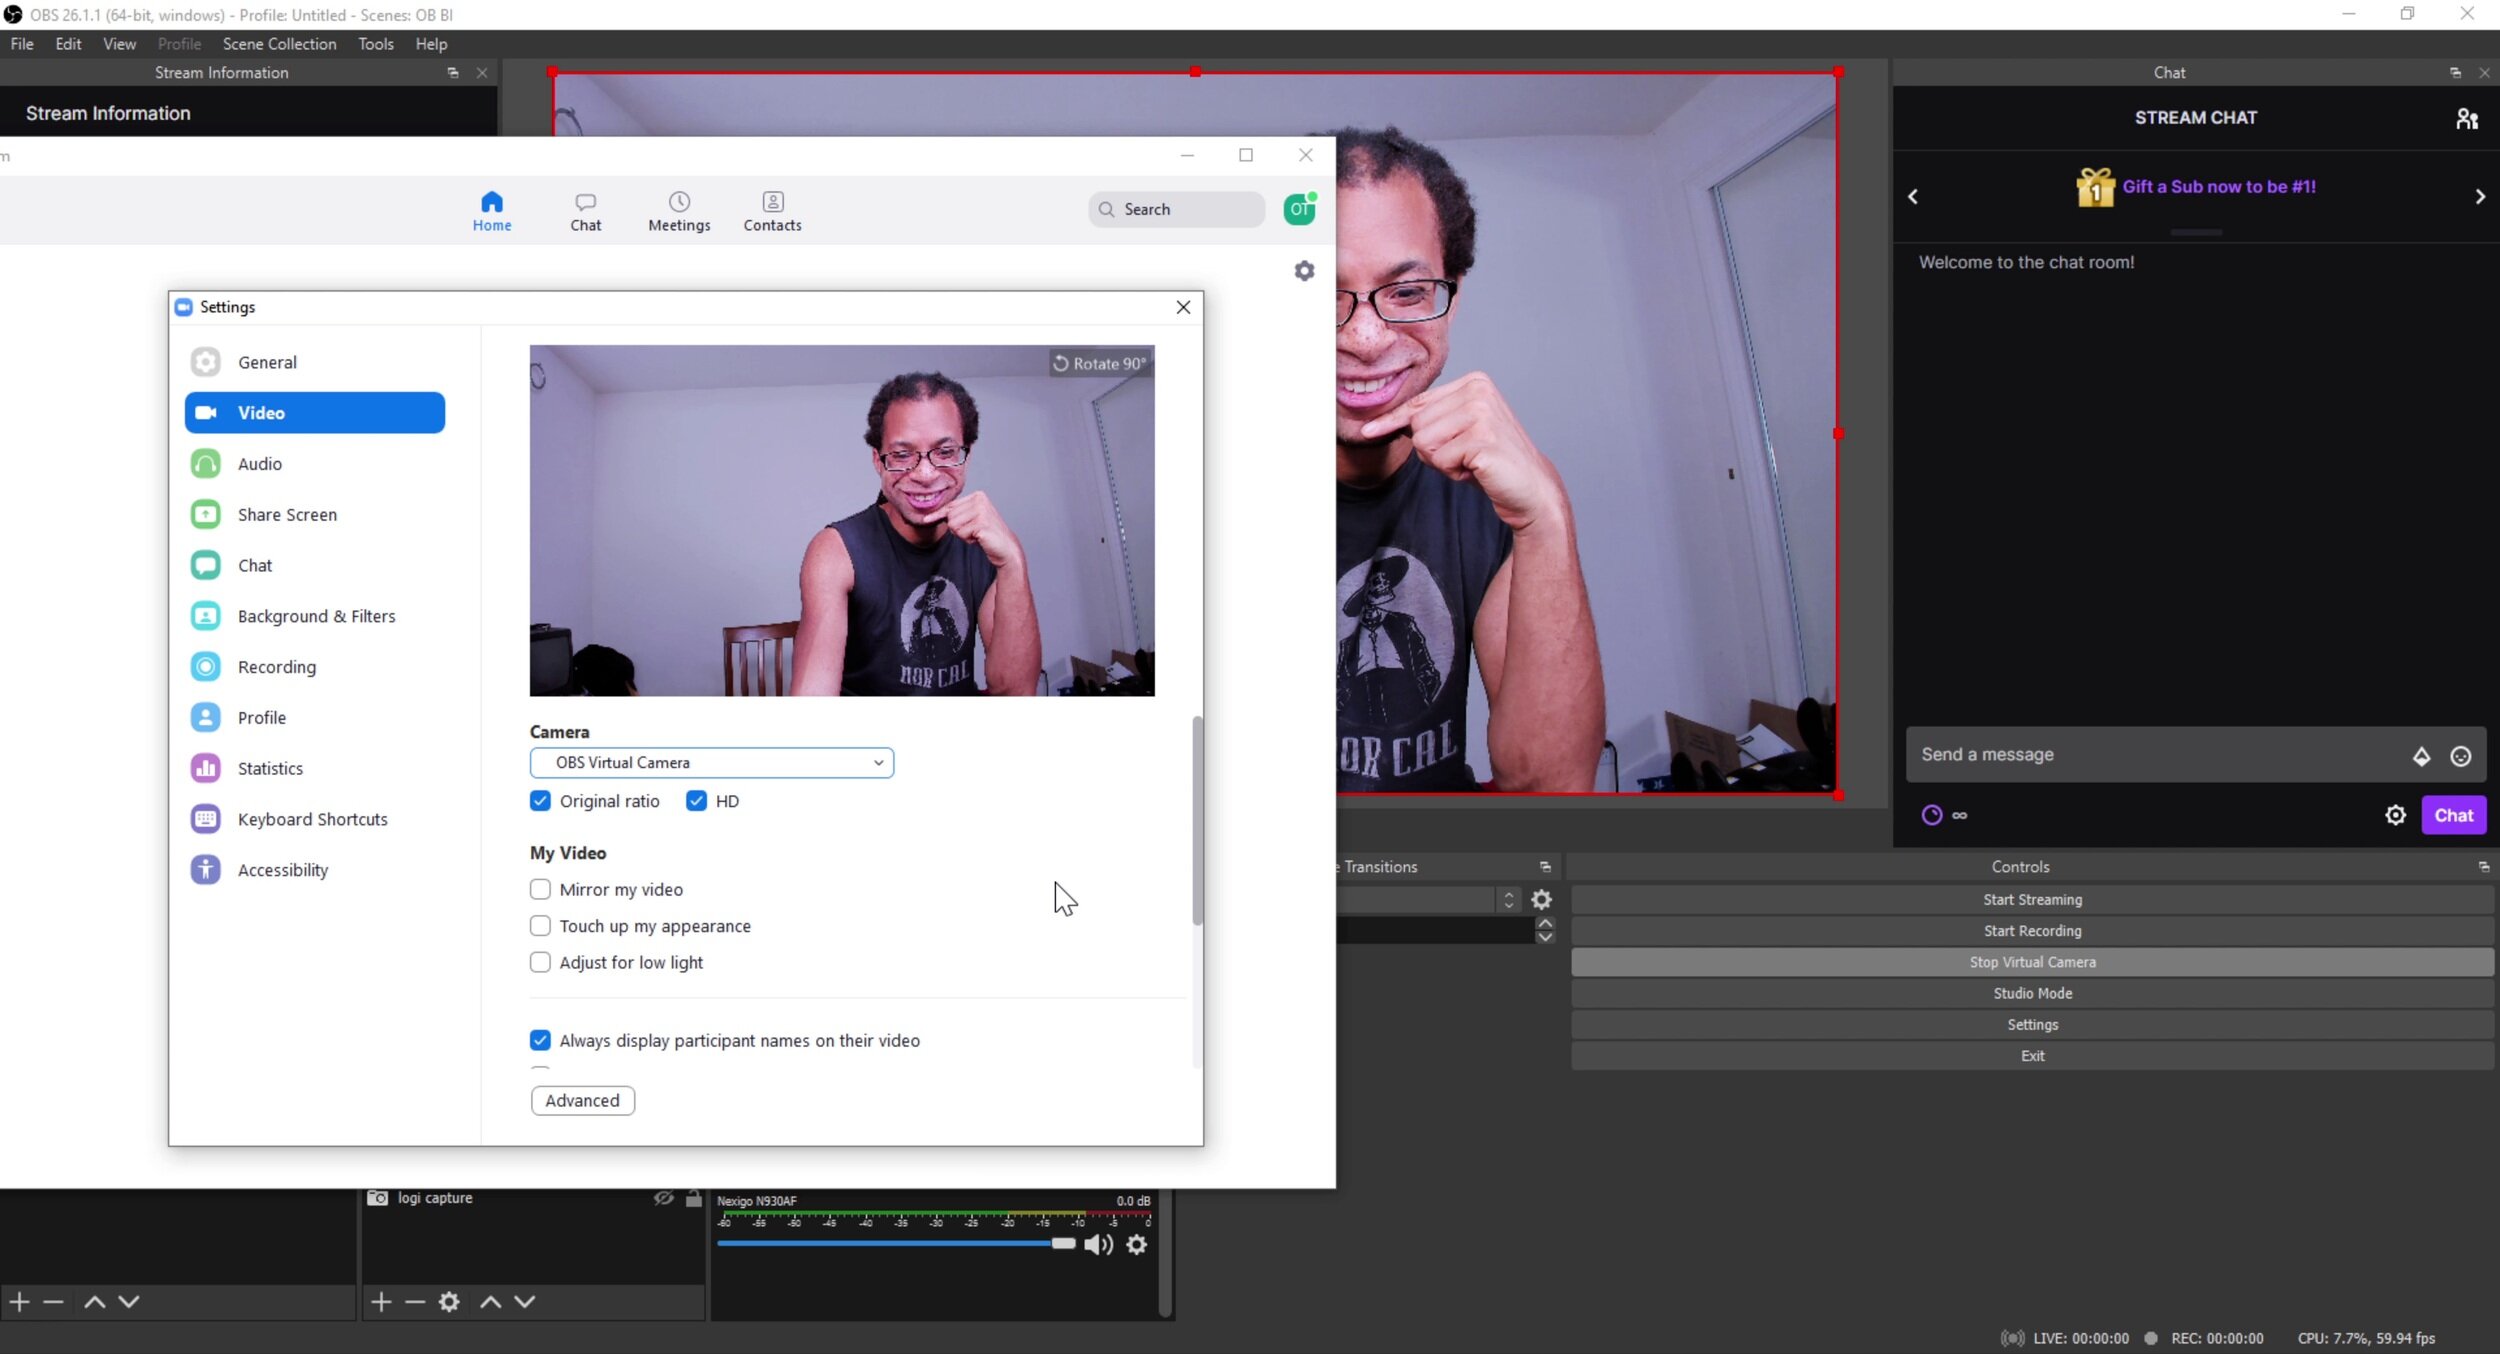
Step 3: In Zoom, go to settings > Video > Camera > OBS Virtual Camera.
Close and reopen Zoom if it’s already open. Important: Pressing the “X” in the upper right does not close Zoom all the way. Right click Zoom on the task bar at the bottom and click “Quit Zoom”. Once Zoom is open, click the settings gear on the upper right, go to video, finally under “Camera” select OBS Virtual Camera. Done!
Step 4 (optional): Adjust webcam settings manually in OBS.
First, remove the auto settings in Zoom such as touch up appearance, low light adjustment, and mirror my video. Now in OBS, you can add tweak your webcam settings to your liking (my best webcam settings guide) and add any filters you want to it (my LUTs guide), even a chroma key.
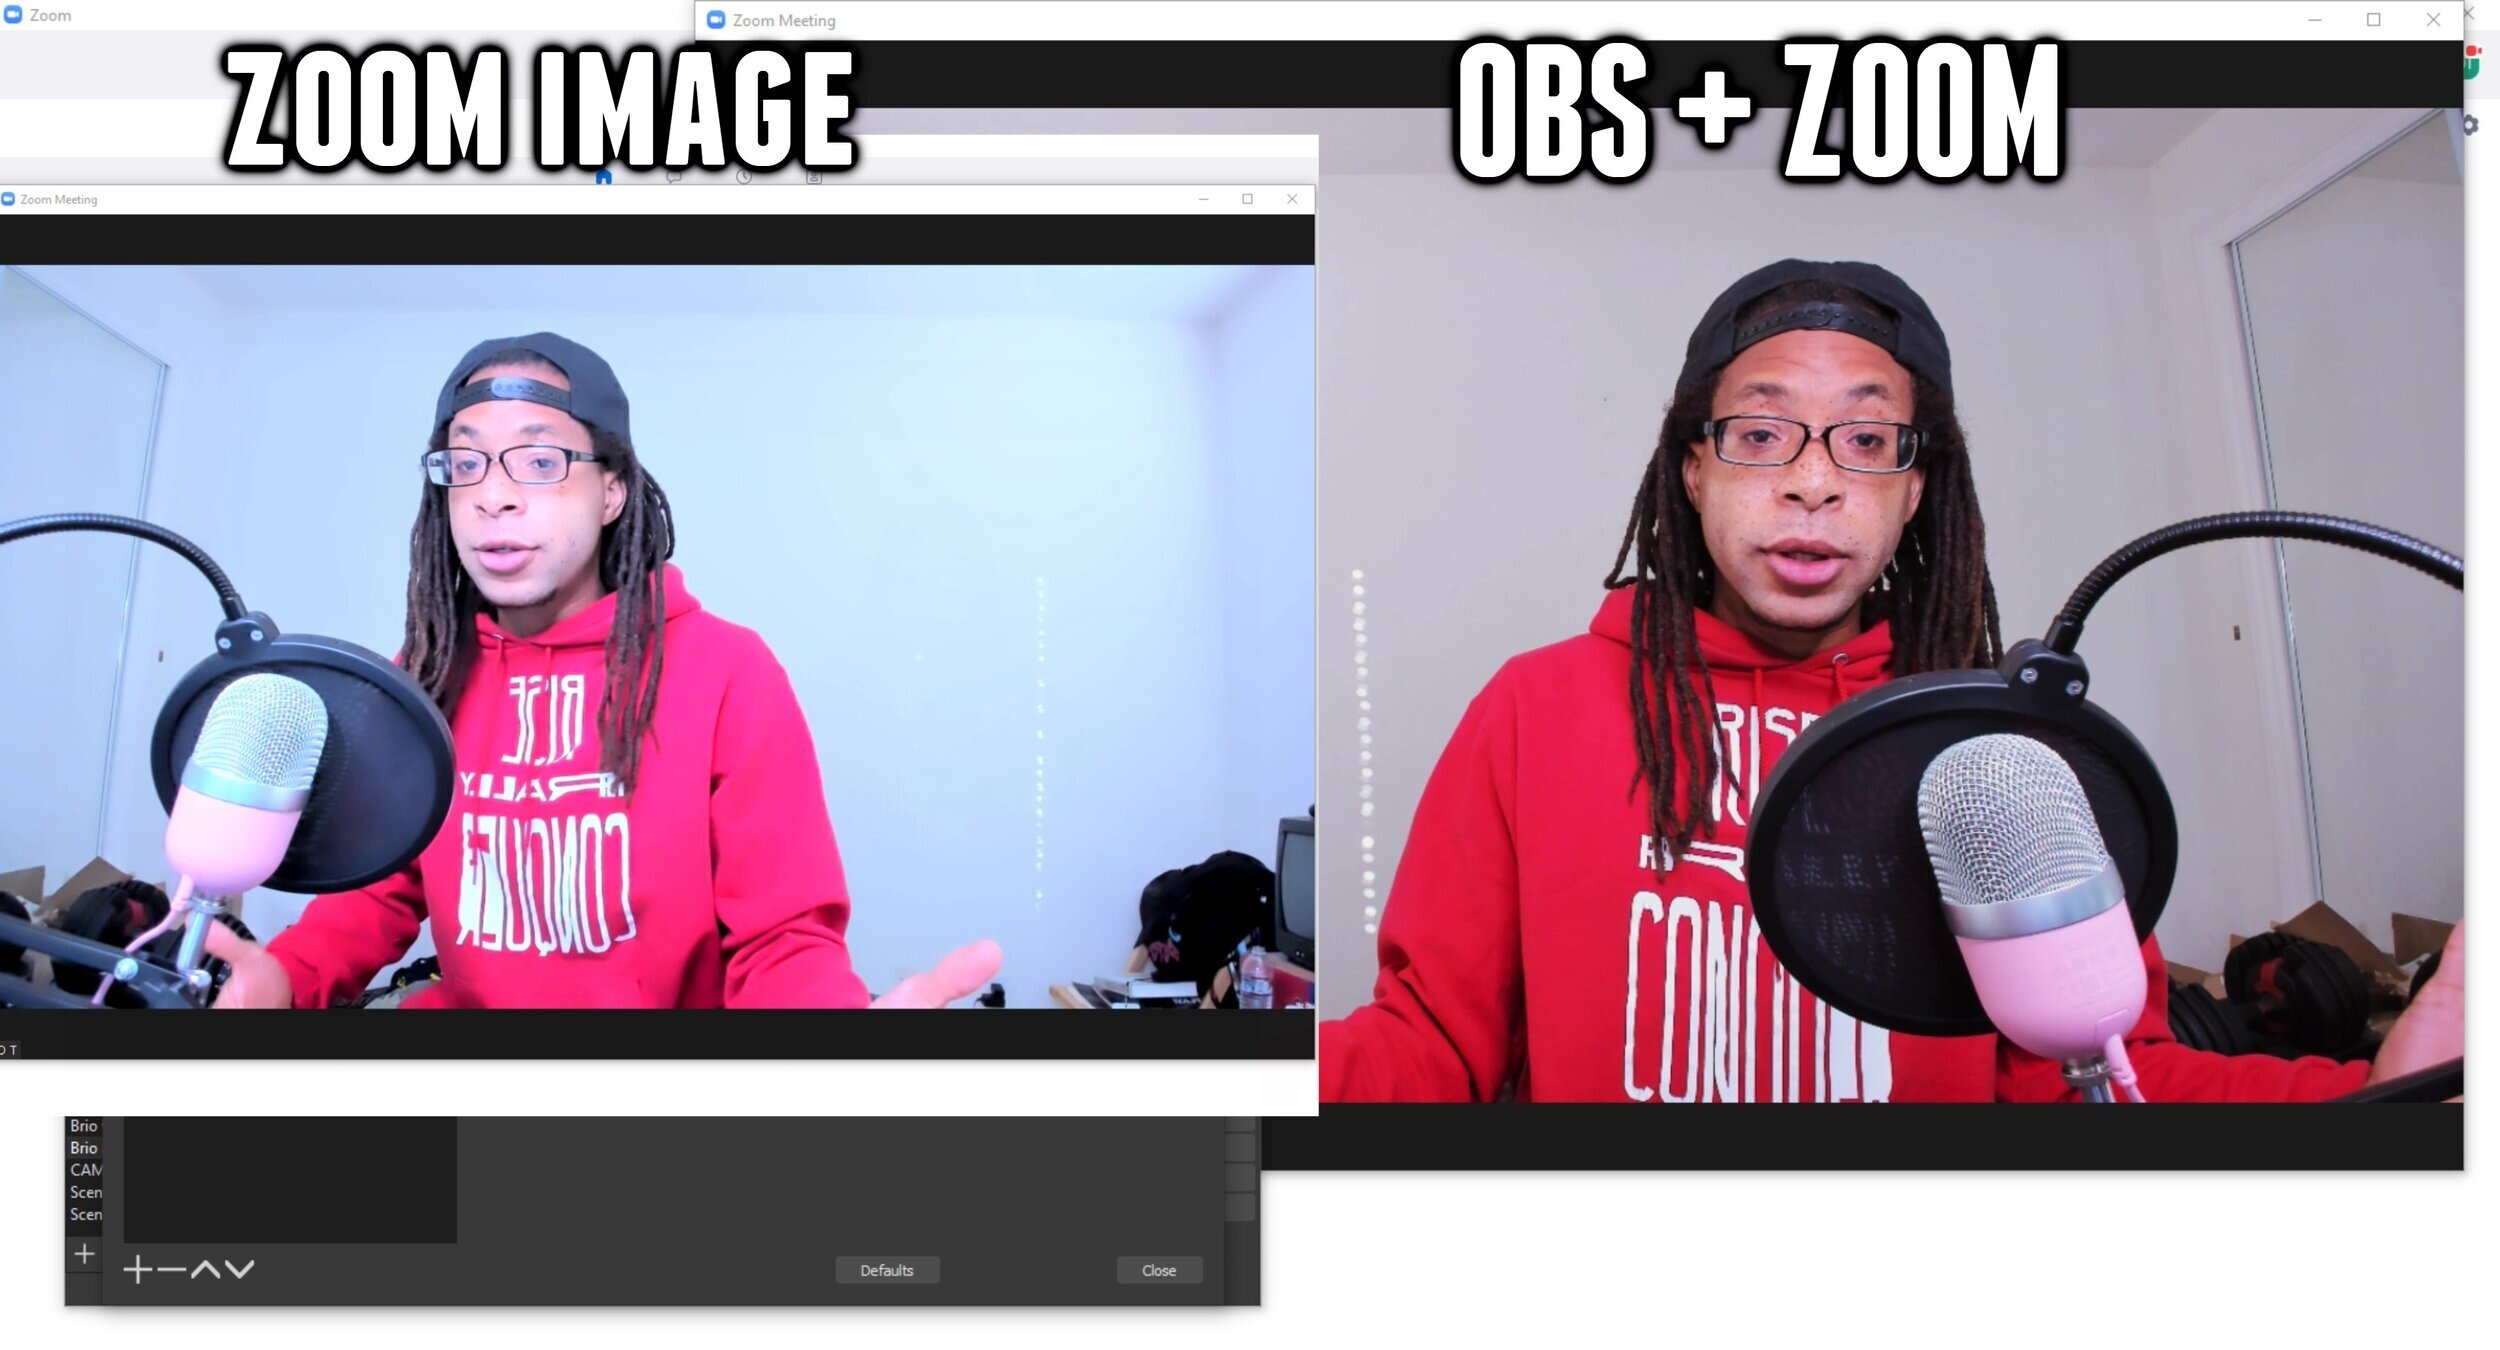
Before with Zoom only, after with optimized OBS webcam settings and a LUT filter.
Summary
Here’s how to add OBS as a webcam source in Zoom:
Step 1: Update to the latest version of OBS Studio.
Step 2: Click Start Virtual Camera in the bottom right.
Step 3: In Zoom, go to settings > Video > Camera > OBS Virtual Camera.
Step 4: (Optional) Adjust webcam settings manually in OBS.
Method 2 (old method)
You will need:
- Open Broadcaster Software Studio (OBS)
- Zoom
- OBS-VirtualCam Plugin
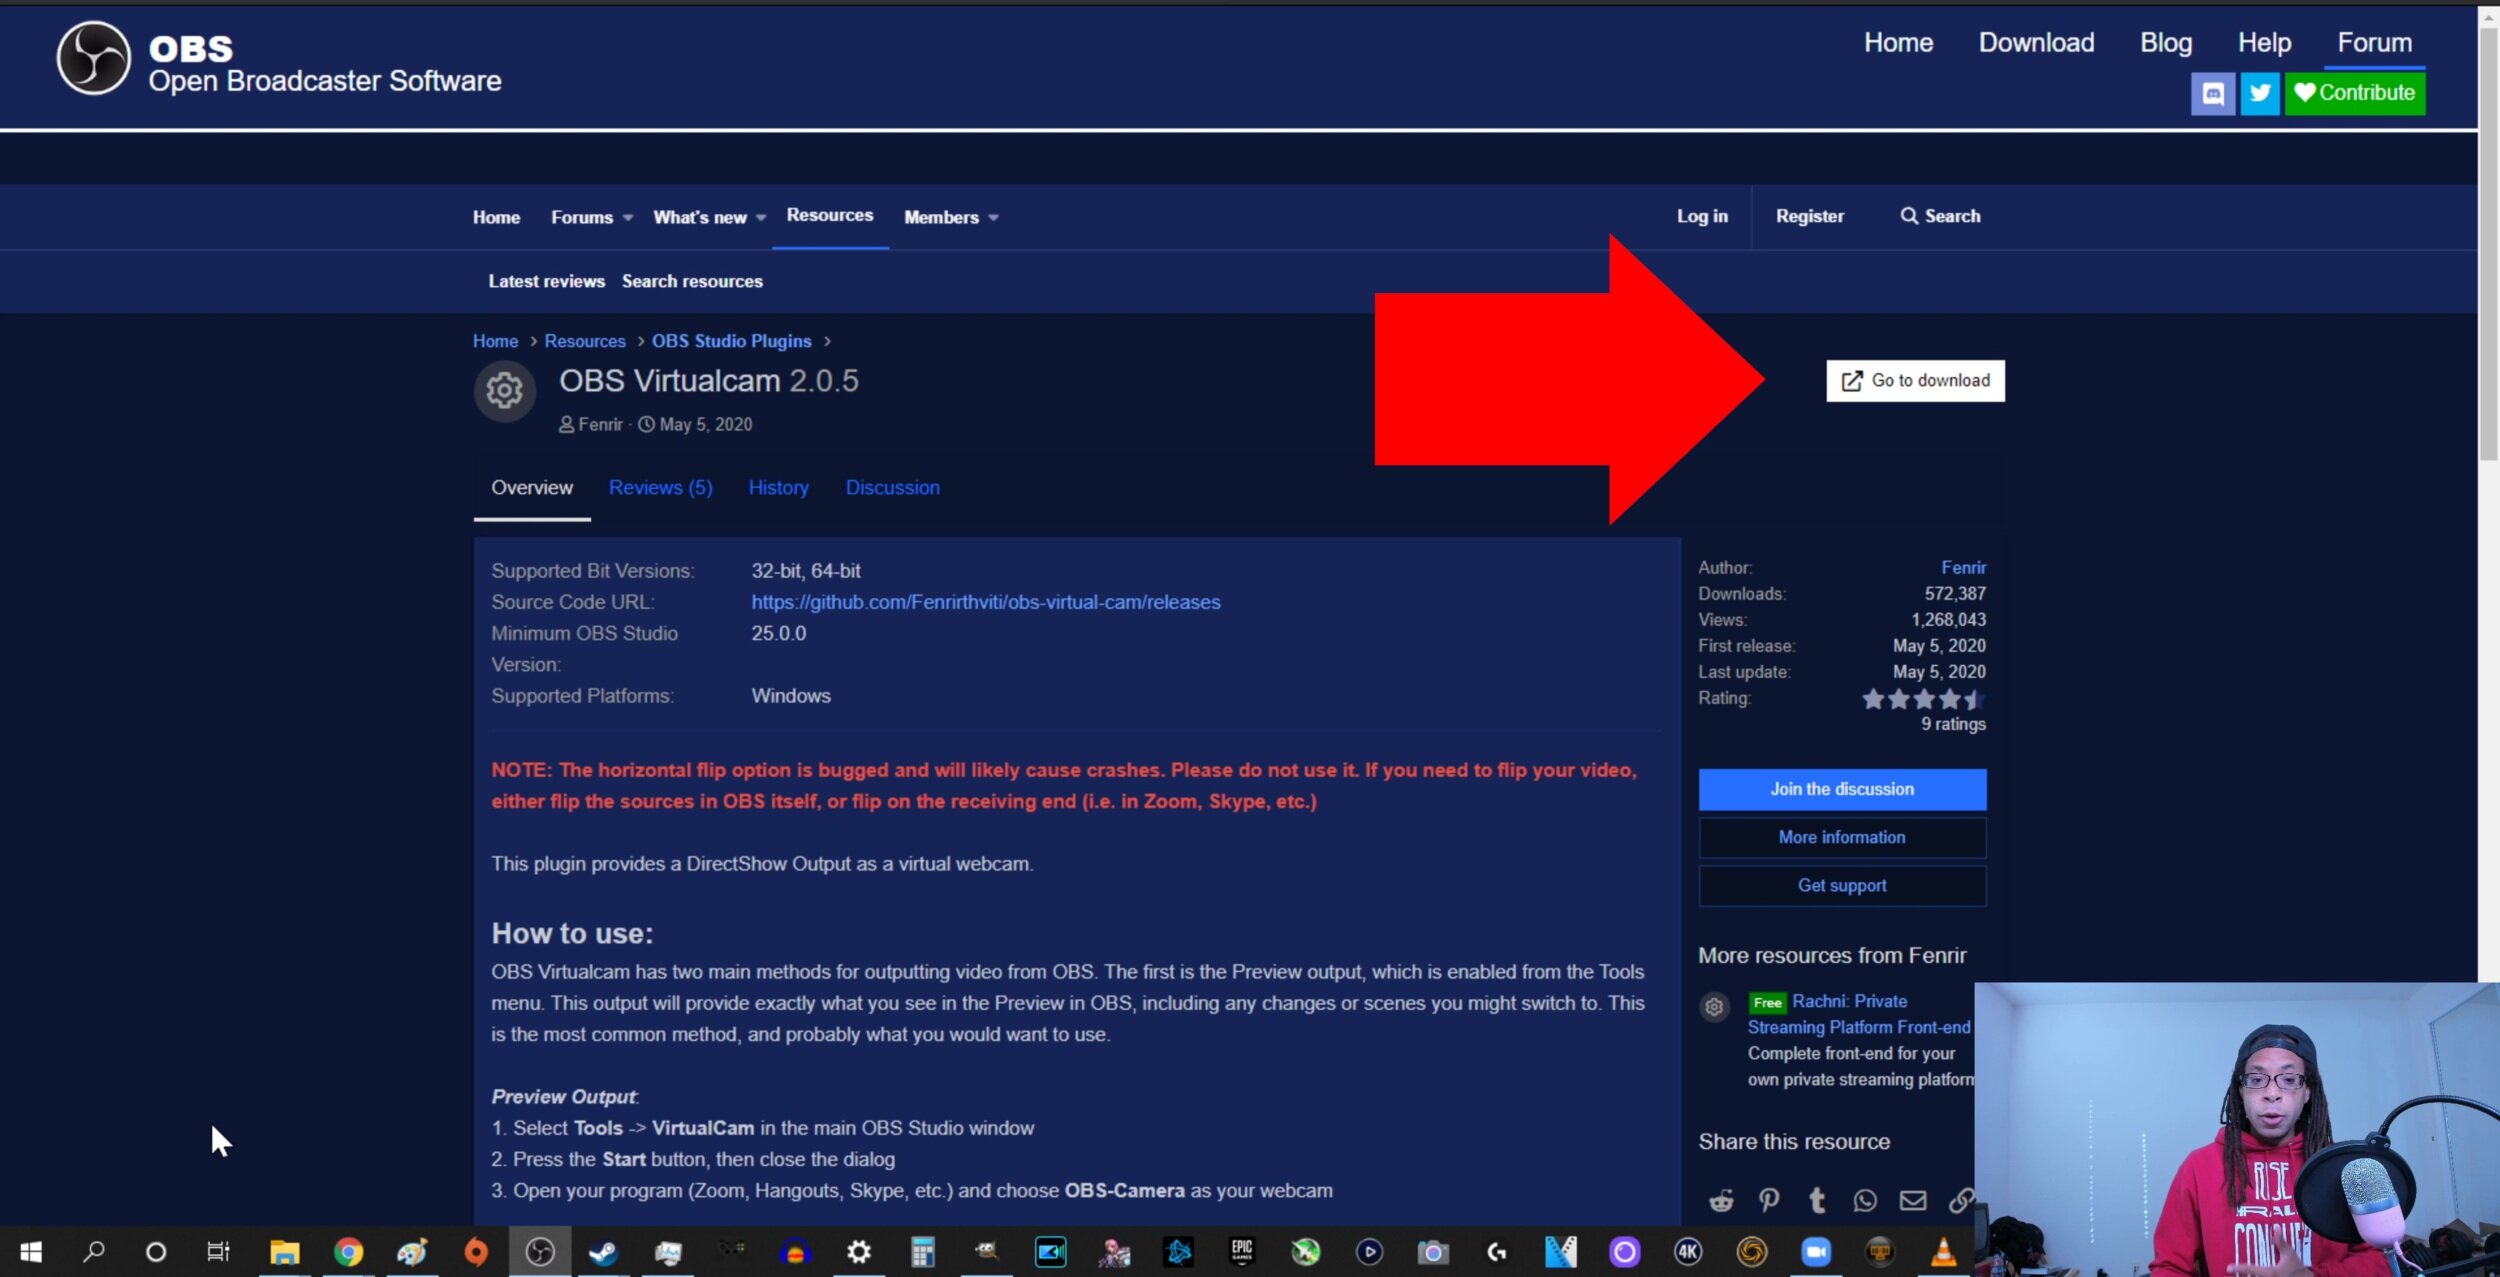
Step 1: Download and install the OBS VirtualCam plugin.
Here is the download link on the OBS Project website. You can download it to wherever you want. Open the file you just downloaded. By default, this installs in your OBS Studio folder. On the number of virtual cameras to register, select 1, then Install.

Step 2: Start Virtualcam plugin in OBS.
Close and reopen OBS if it’s currently open. Go to tools > VirtualCam. Target Camera should be OBS-Camera. Buffered Frames should be set to zero. This adds delay to the feed going to Zoom and shouldn’t be needed for most cases. Click Start.

Go to Tools > VirtualCam on the upper left of OBS.
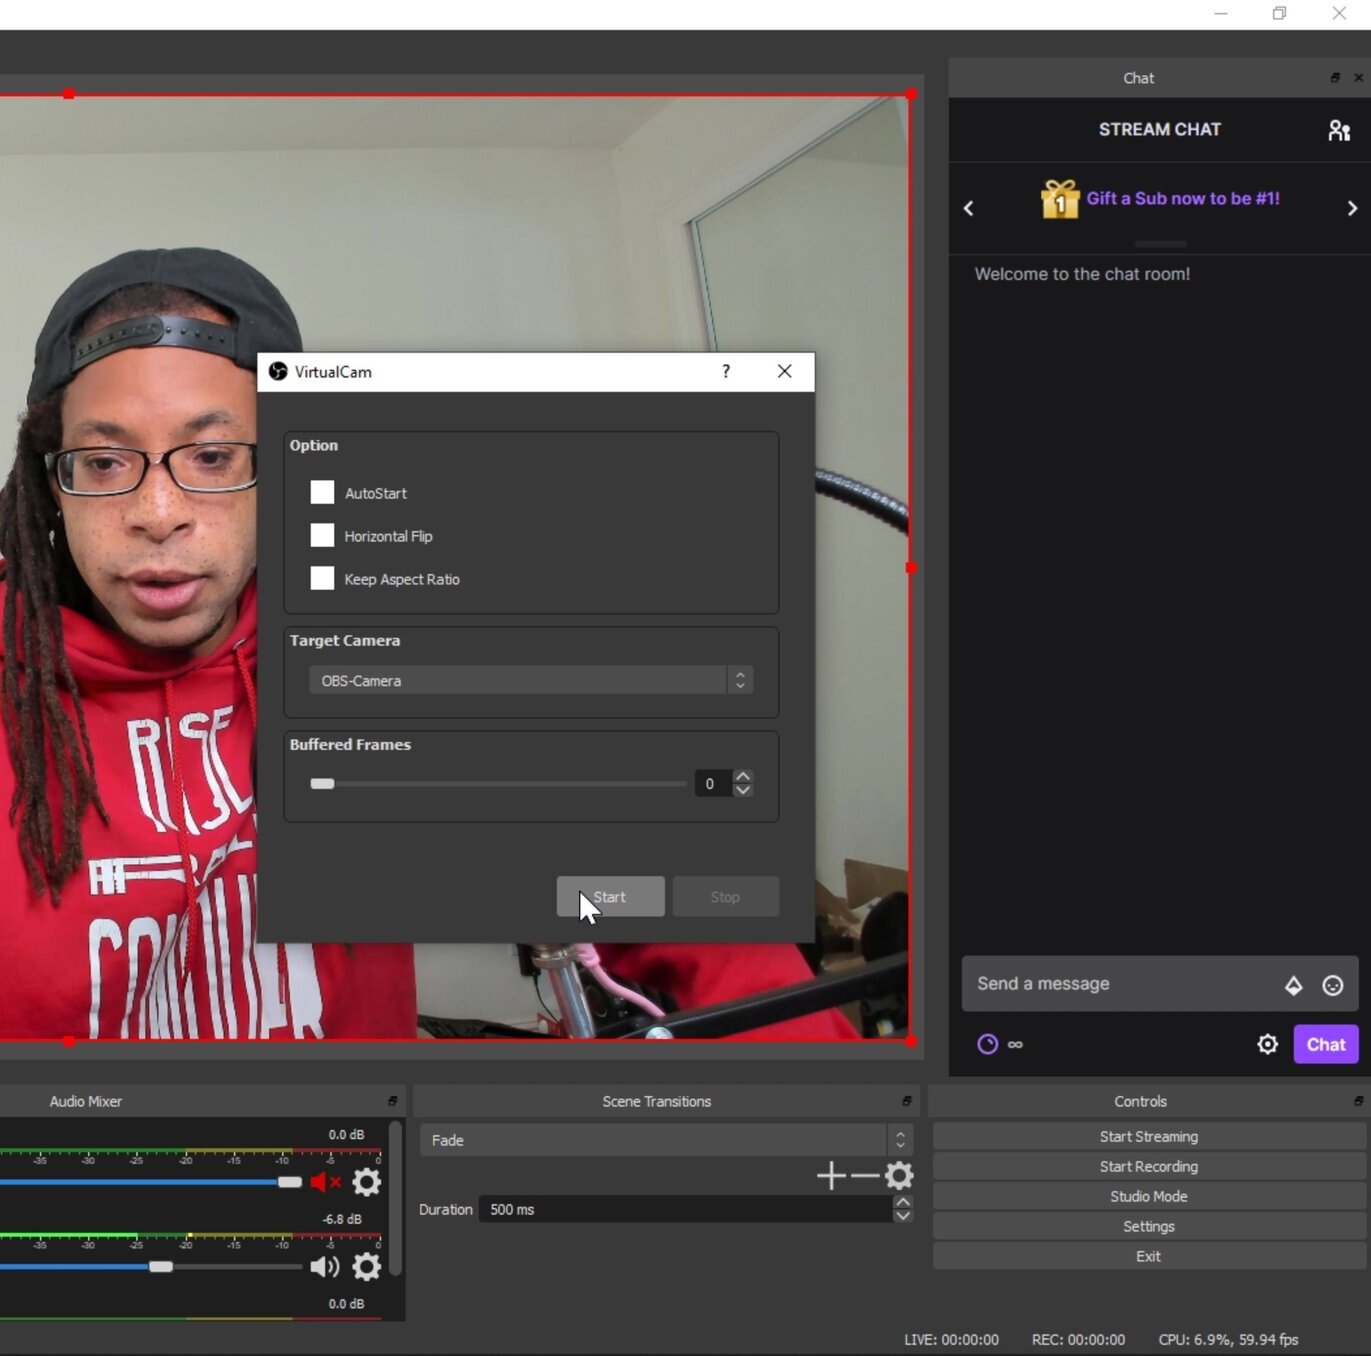
Set Buffered Frames to 0 and click Start.
Step 3: Add OBS-cam to Zoom.
Close and reopen Zoom if it’s already open. Once Zoom is open, click the settings gear on the upper right, go to video, and under “Camera” select OBS-Camera.

In Zoom go to Settings > Video > Camera and choose OBS-Camera.

Now your OBS feed should be in Zoom!