
How to use a DSLR or Camcorder as a Webcam in OBS, Zoom, and more. [Step by step guide]
This article contains affiliate links. As an Amazon associate I earn from qualifying purchases.
This guide will teach you how to connect a camcorder, DSLR, or mirrorless camera to your computer to use as a webcam for recording or streaming to Zoom, OBS Twitch, and other streaming softwares and platforms. The cameras I’ll be using to demonstrate are the Canon VIXIA HF R800 camcorder and the Canon Rebel T3 (Amazon).
There are two methods to connect your camera as a webcam:
Method #1: Camera as webcam with a capture card.
Method #2: Canon EOS Webcam Utility.
Method 1
You will need:
-A camera
-A computer
-A capture card
-An HDMI cable
Clarification on which capture card and HDMI to use
Which capture card to get depends on:
-the resolution and frame rate of your camera.
-if you want an internal or external capture card.
The Canon VIXIA HF R800 Camcorder records at 1080P, 60 FPS. For this, you can use cards such as the Elgato Cam Link, or Elgato HD60S (Amazon). These are both external capture cards. There are some really cheap no-name brand cards that have been selling for around $25 on Amazon, and I’ve reviewed one by BlueAVS here.
For higher resolutions, you’ll need a 4K capture card, so you can use cards like the Elgato 4K60 Pro or the AVerMedia Live Gamer 4K (Amazon). These two are internal capture cards. I’ve reviewed several capture cards on this site. Just pick whatever can do your camera's resolution.
Internal capture cards connect directly to your motherboard. External capture cards connect through a USB port. If you have a laptop, then you have to get an external capture card.
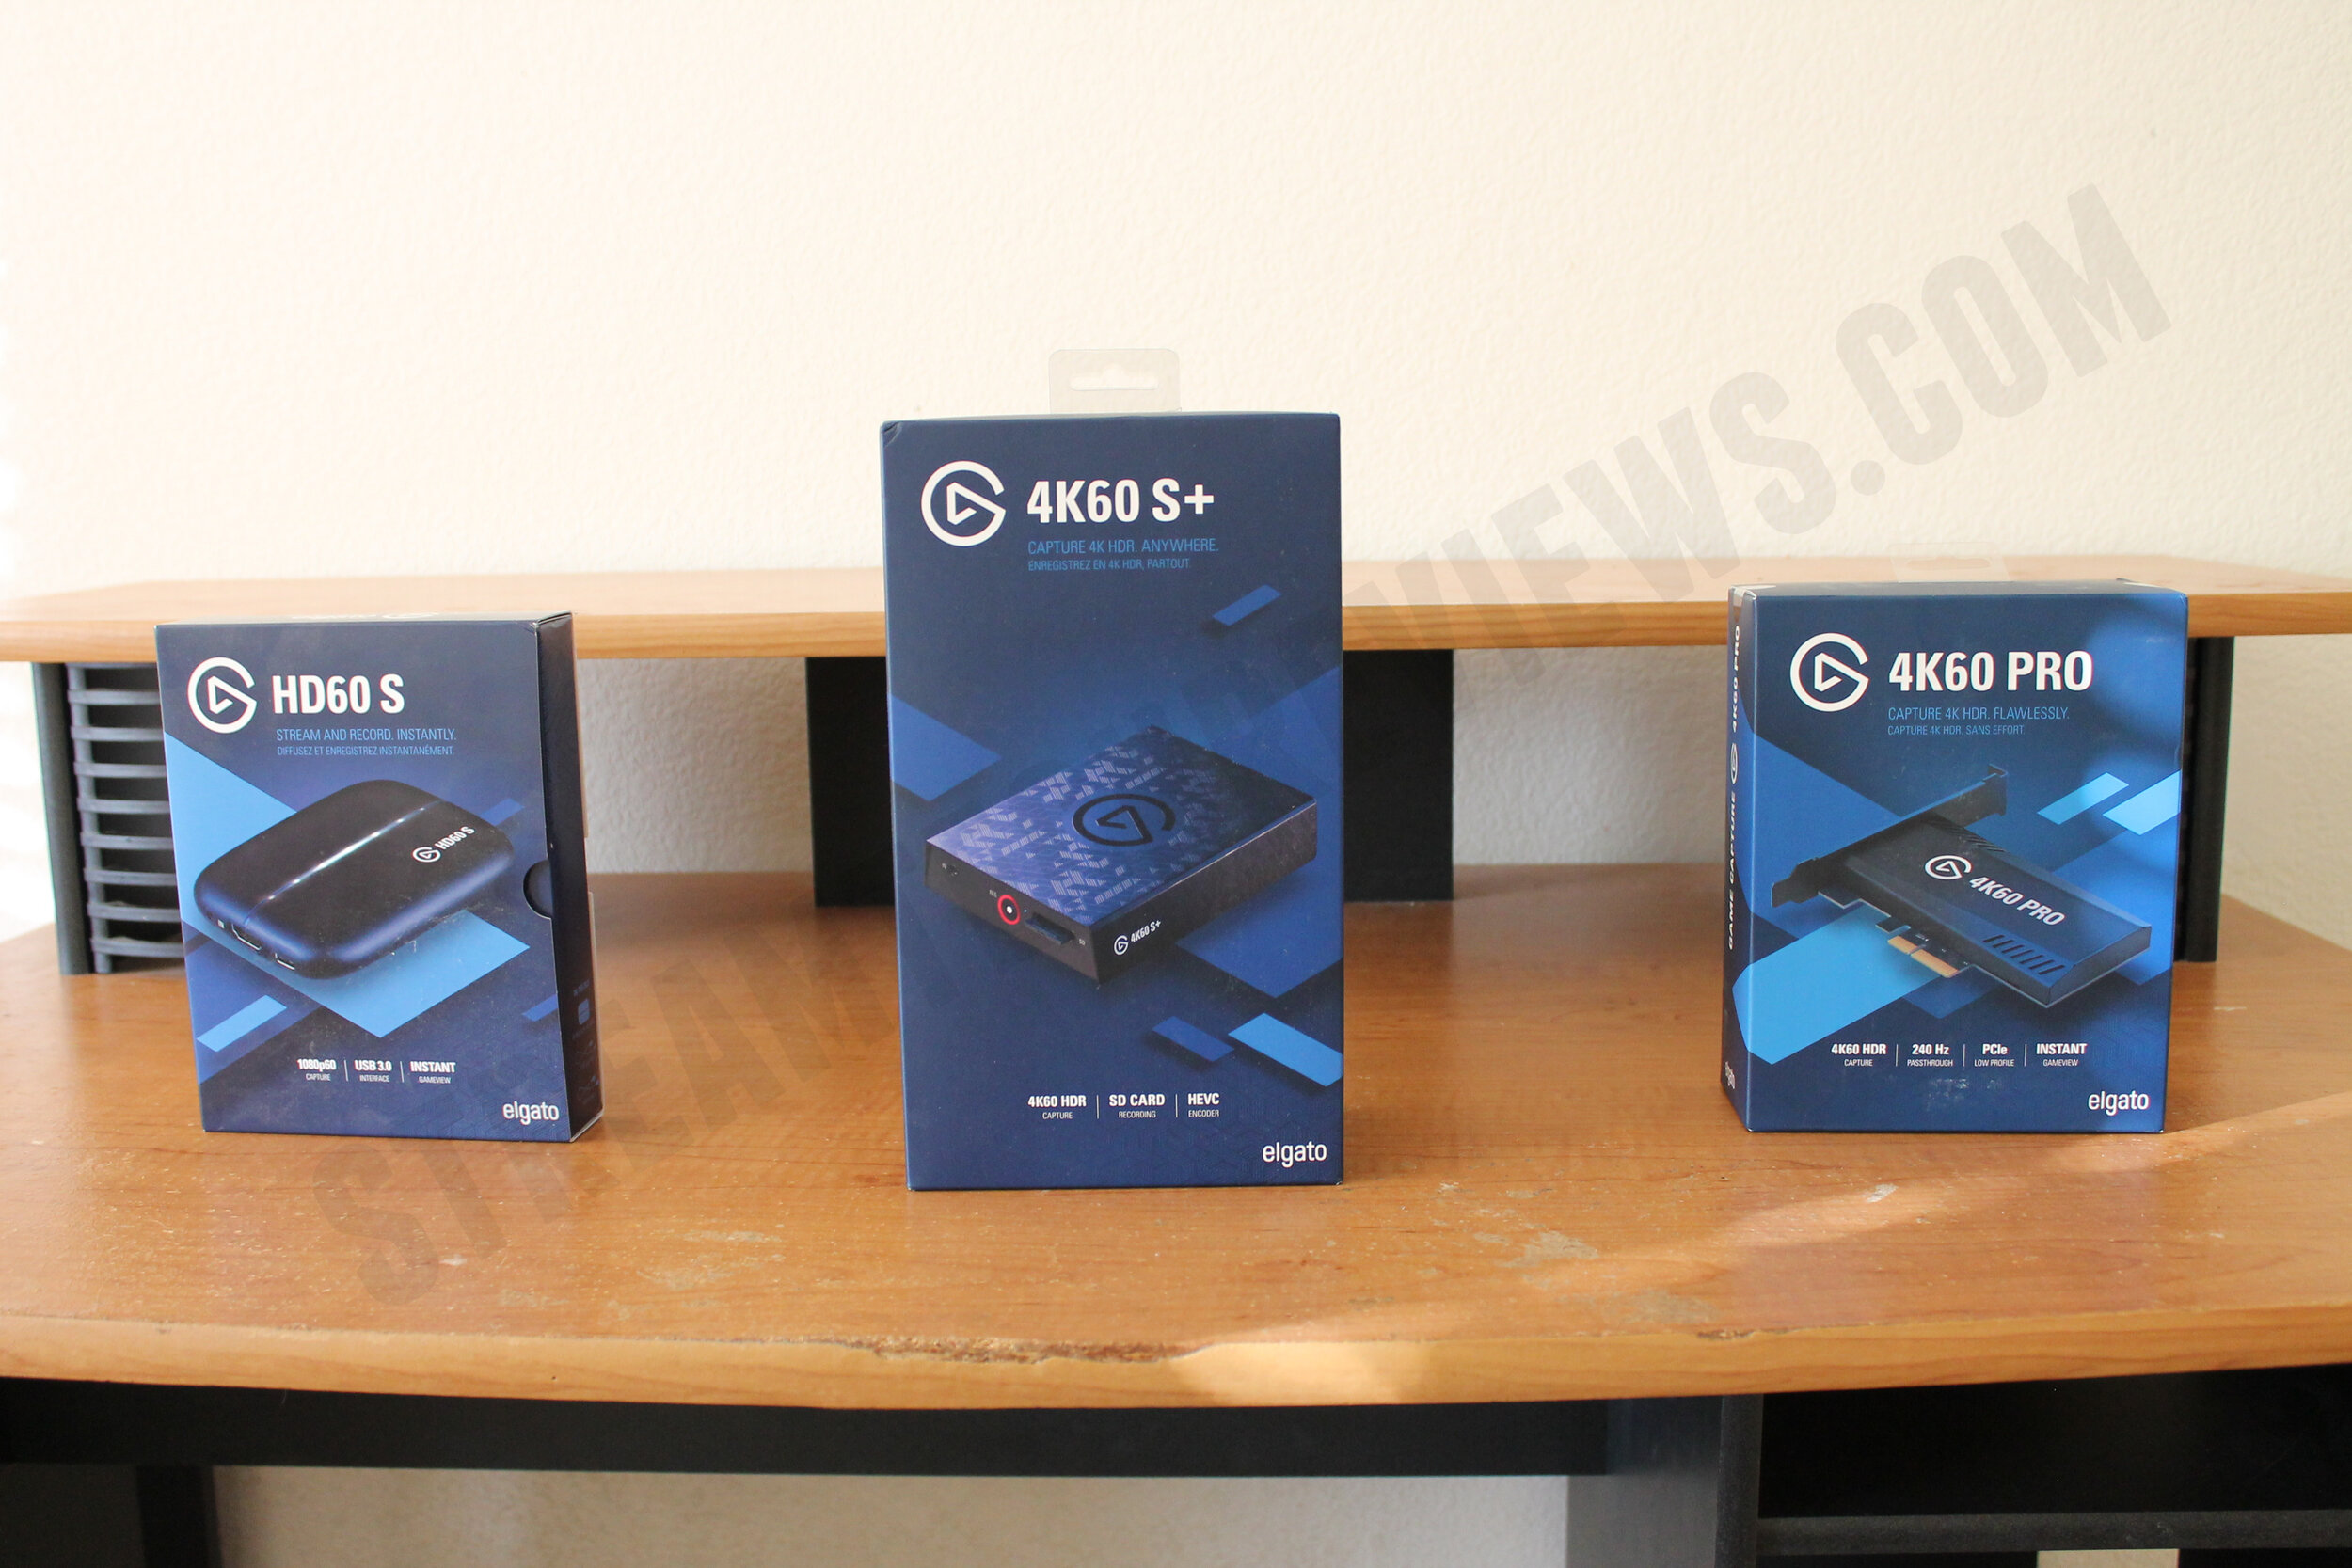
Elgato HD60S, 4K60 S+, 4K60 Pro.

AVerMedia Live Gamer 4K
The HDMI cable that you need probably came in the box of your camera. But for both of these devices The Canon VIXIA HF R800 and Canon Rebel T3, they use a mini HDMI to HDMI cable. 4K devices generally require premium HDMI cables.
Step 1) Set up your capture card.
Every capture card sets up a little bit differently, so I’ll show both the Elgato HD60S and the Elgato 4K60 Pro.
For The Elgato HD60 S, download and open the software from Elgato's website. Then connect your capture card by a USB 3.0 slot.
With the Elgato 4K60 Pro, same thing - download and open the compatible software from Elgato's website. This one is an internal capture card, so you connect it to the PCIe x4 slot on your motherboard.

Installing Elgato 4K60 Pro. (Be aware that HDR on this card does not work with AMD graphics cards currently).

Make sure whatever program you downloaded, like Elgato Game Capture, is muted, so you won't hear yourself in a feedback loop.
Step 2) Prepare your camera to be connected to your computer.
Lock in all your settings like your white balance and exposure now, so you don't have to reach over and do it later. Plug your camera into a power source, so it doesn't die. For some cameras, you need a dummy battery to keep it powered on for long streams (video example).
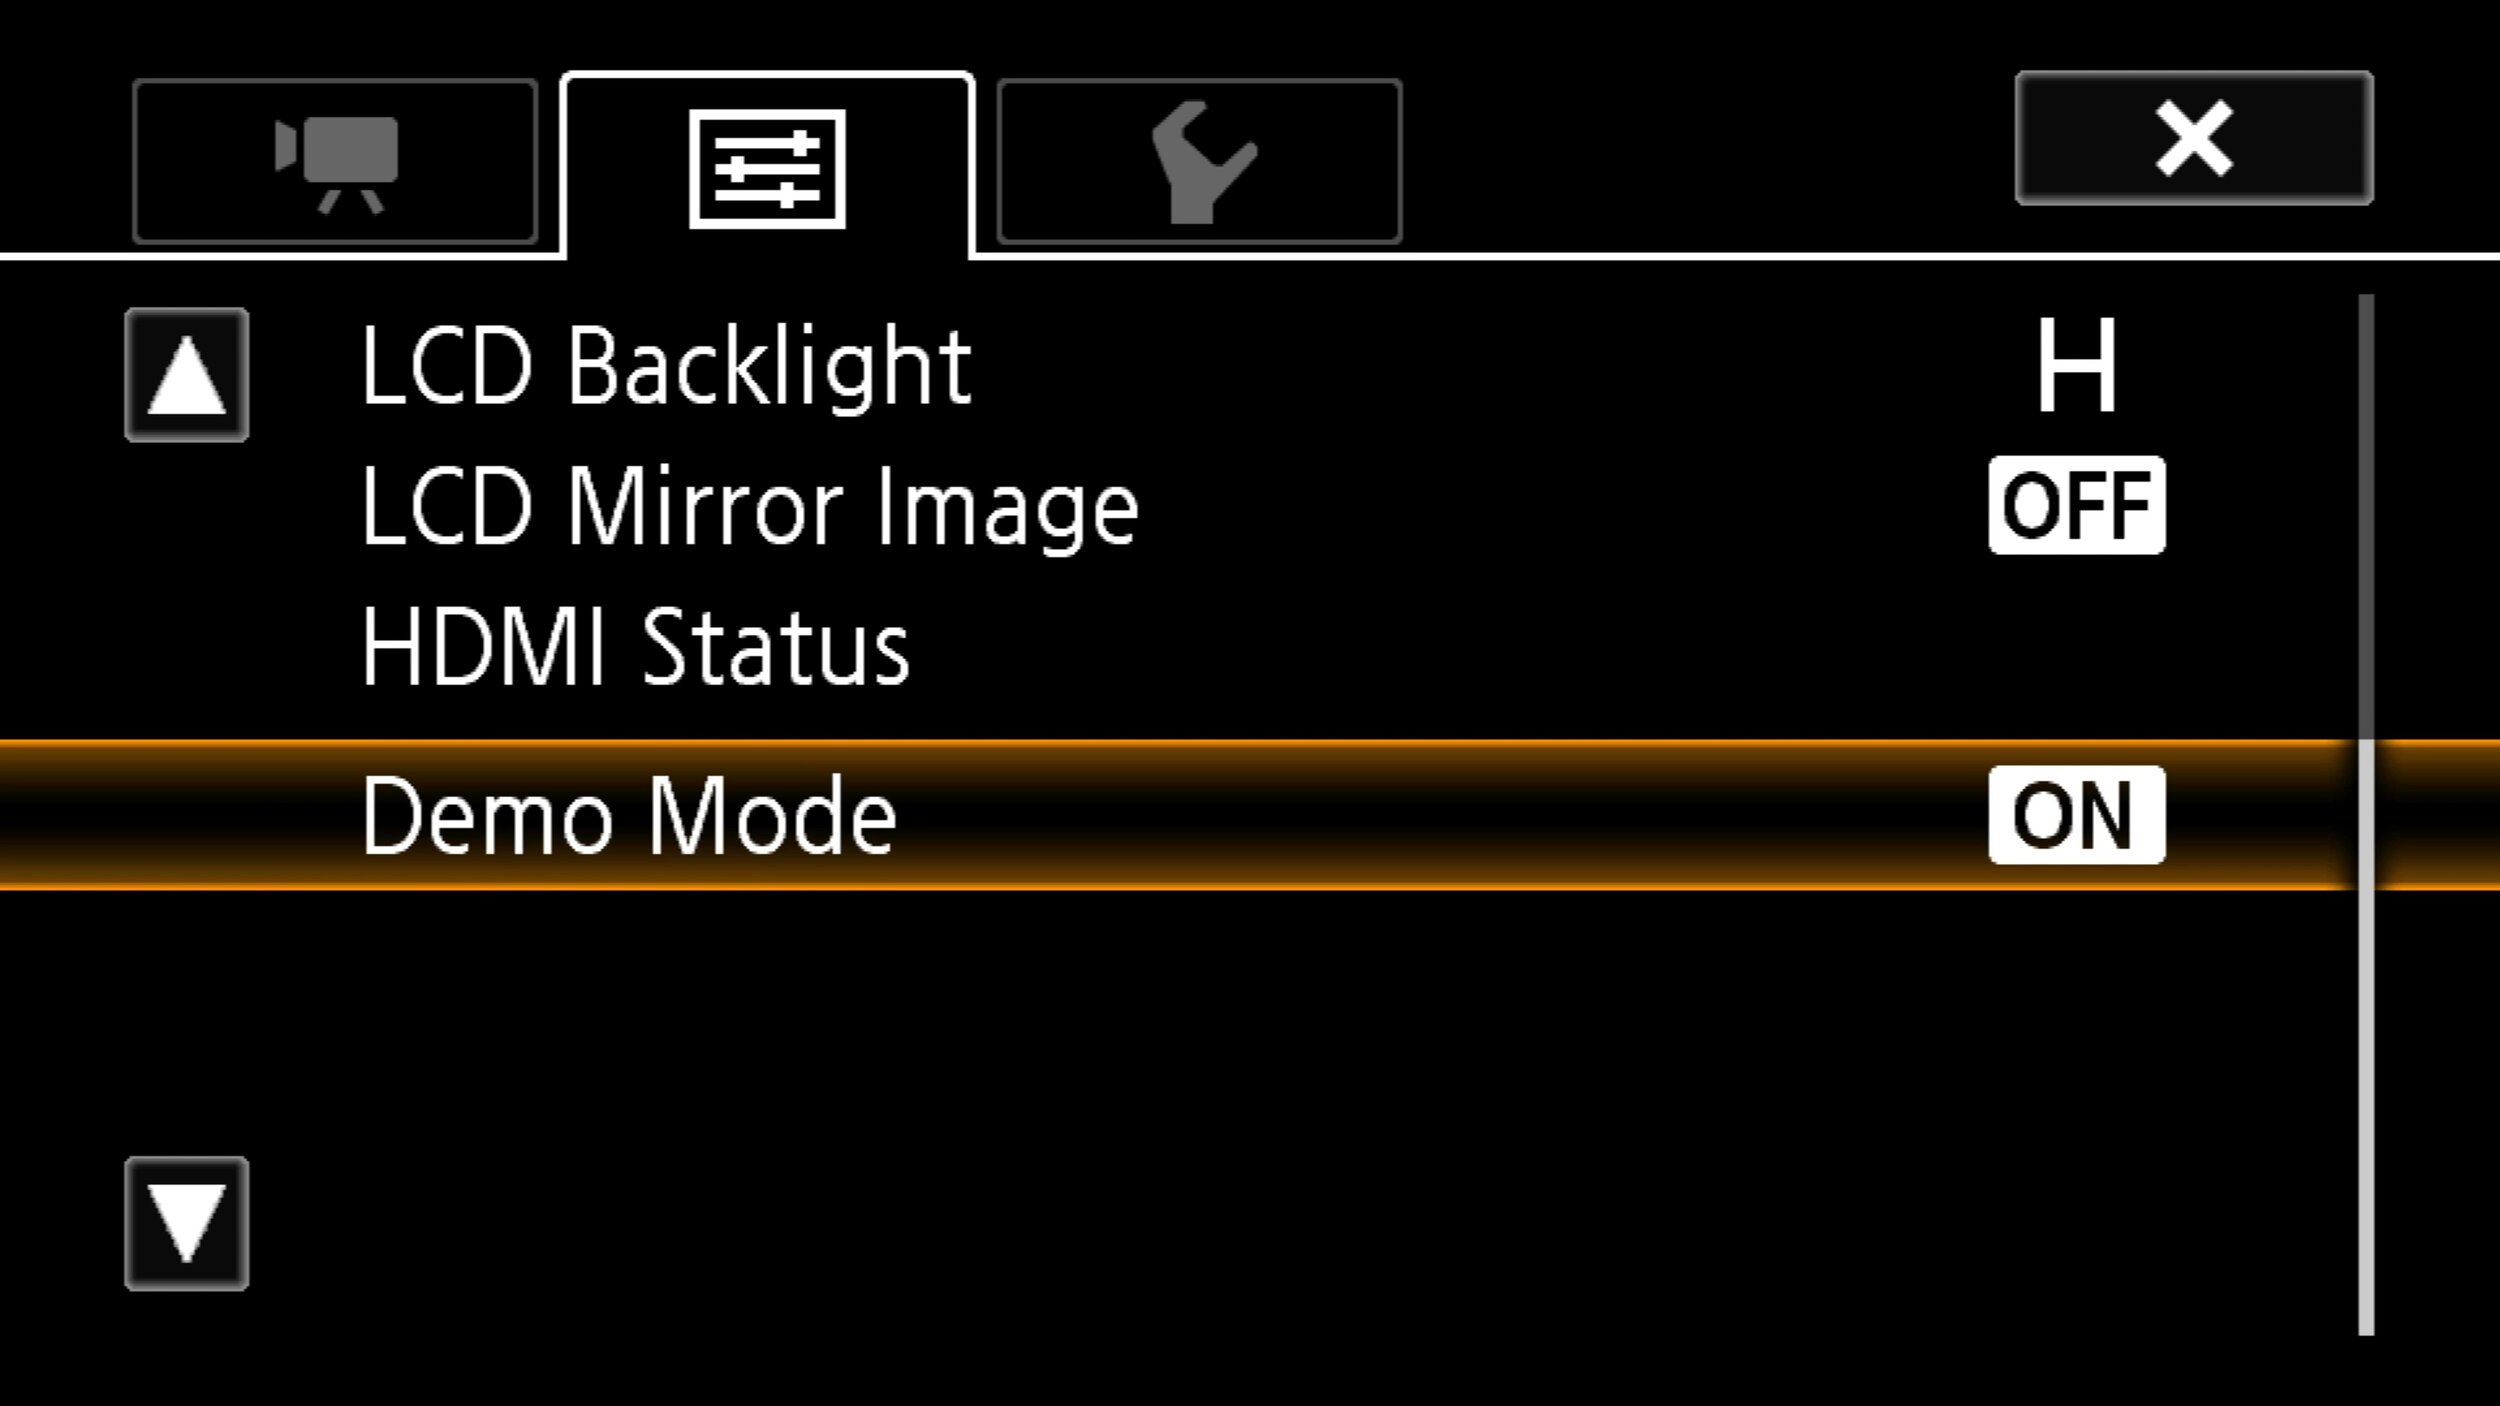
This is when you can change your camera to clean HDMI out. This makes it so the camera won't display all your overlays on your stream. For example, on the VIXIA camcorder go to home>other settings>output onscreen displays>off. Then, go back and go down to Demo Mode and turn that off as well. You can only turn this off when you're actually plugged in and with the SD card not inserted. This prevents the features demo from interrupting your stream. A lot of Canon EOS cameras, like the Rebel T3, do NOT let you do clean HDMI out. Don't worry about it. For those Canon cameras, you’ll be using method 2.

This must be set to OFF for clean HDMI out.
Turn this OFF as well.
Step 3) Connect your camera to your capture card.
Turn your camera on if it's not on already. Plug the HDMI into your camera. For the VIXIA, the HDMI mini side goes into the camcorder. Put the other side of the HDMI cable into the "HDMI in" slot of your capture card. In whatever capture card program you downloaded, you should now see your camera's footage. If the program gets stuck at “initializing” or “please wait”, exit and reopen.

Camcorder footage in Elgato Game Capture HD.
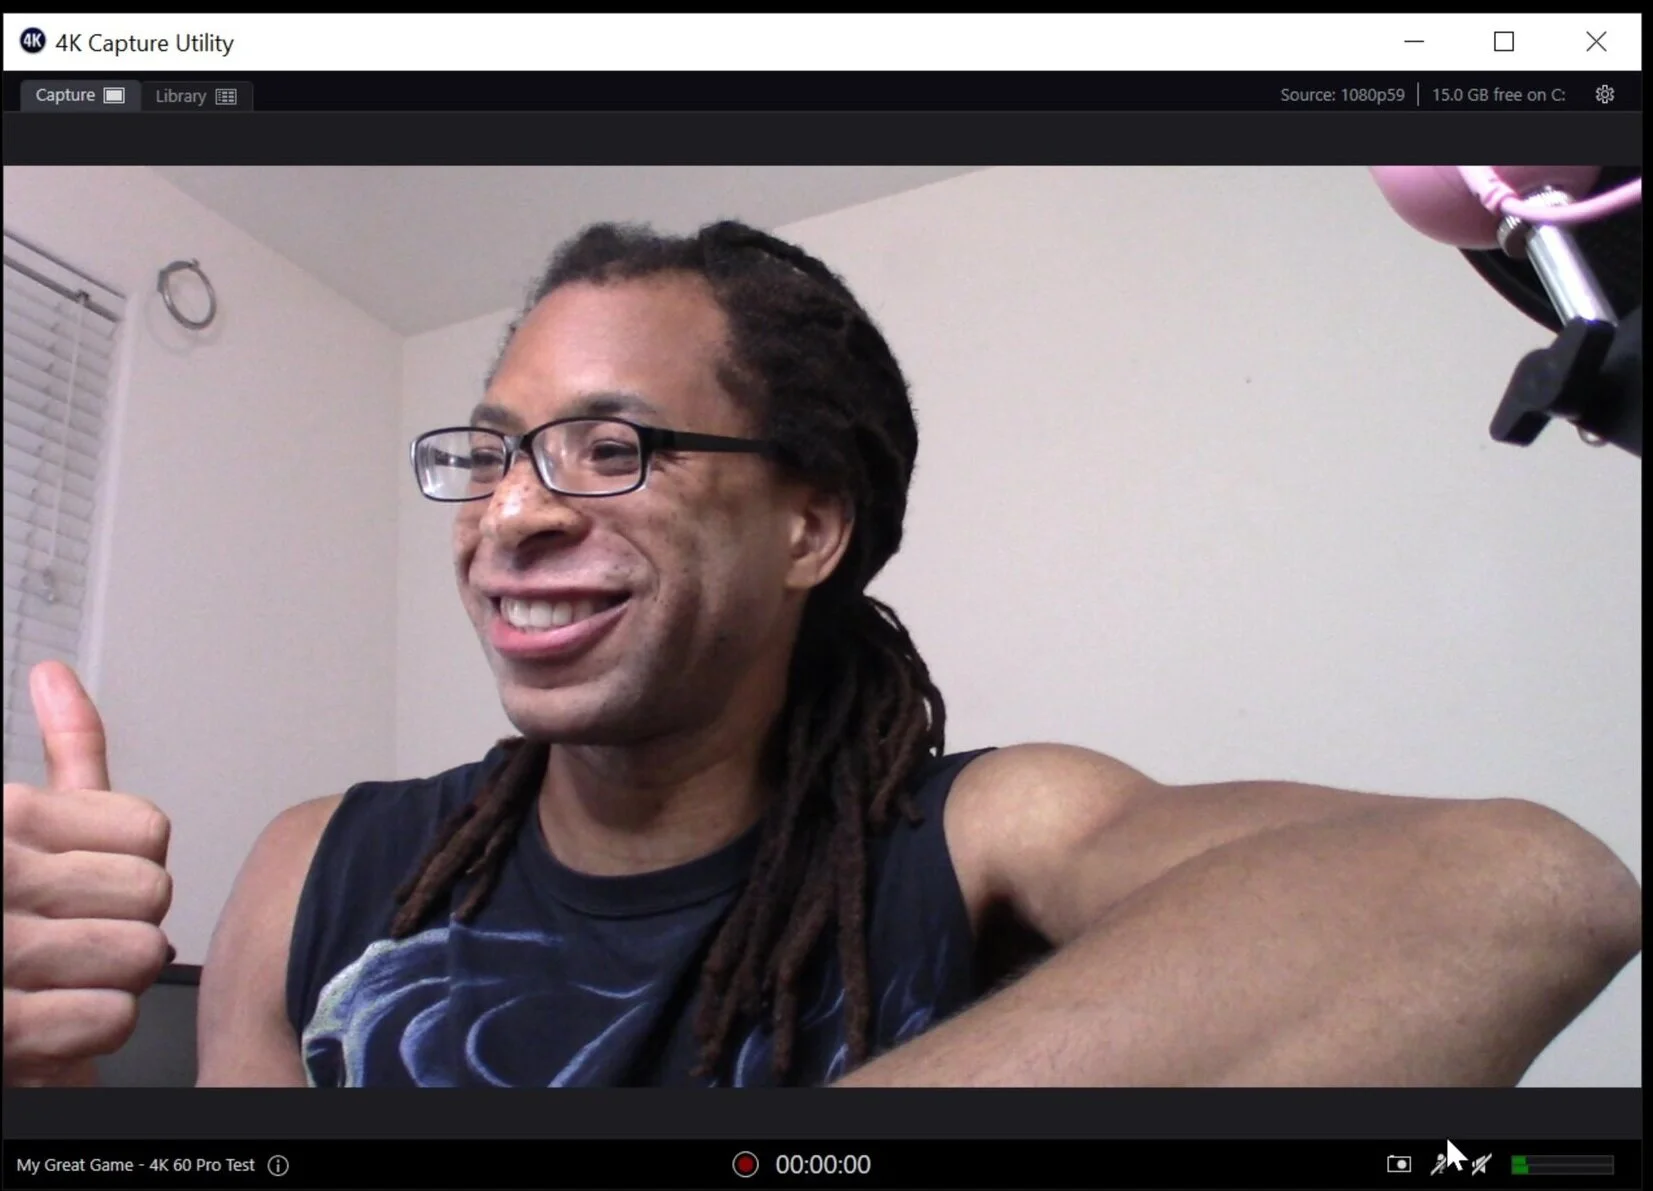
Camcorder footage in Elgato 4K Capture Utility.
Optional step here. Connect the capture card to an external monitor. Plug another HDMI cable into the out port of your capture card, and connect the other end of that cable into another monitor. This is really only needed for gaming since this passes through a zero-latency signal for playing on.
Step 4) Use your footage in other software.
To get this footage in OBS, just close the native program like Elgato Game Capture HD. Most cards can only be active in one program at a time. Open OBS, and add your capture card as a video capture device source. To get it in Zoom, Skype or other programs, open settings and add the capture card as the camera source. Done!


Method 2. (Canon EOS users)
You will need:
-A camera.
-A computer.
-A USB cable.
The list of compatible cameras is in the link in step 1 below. The USB cable you need probably came in the box of your device, but you might want a replacement if the cable is too short. For the Rebel T3, it's a mini USB to USB cable.
Step 1) Download and install the EOS webcam utility.
Here is a link to the EOS Webcam Utility on Canon’s website. Install the utility. it's not an actual app, but after installing the utility, it allows OBS, Zoom, and other programs to see your Canon camera as a webcam.


Step 2) Prepare your camera to be connected to your computer.
Lock in all your settings like your white balance and exposure now, so you don't have to reach over and do it later. Plug your camera into a power source. Again, certain cameras need a dummy battery.
Step 3) Connect your camera to your computer.
Plug the USB cable into your camera and the other side into a USB port on your computer.
Step 4) Activate your camera as a webcam.
In OBS, Zoom, or any program that can access webcams, add EOS Webcam Utility as your video source.

Now you're done! Here are my reviews to some of the capture cards I’ve listed.
4K Capture Card video comparison.
Elgato HD60 S written review.
AVerMedia Live Gamer 4K written review.