
5 Ways to Improve your Webcam Quality [for Zoom, Twitch, YouTube]
If your webcam footage is dark, grainy, or generally just not that sharp, you’re in the right place. You don’t have to rush out to get a new $200 device.
These 5 tips will drastically improve your image quality for Zoom, Twitch, or YouTube videos and make even some of the cheapest webcams look like professional cameras. 4 of these tips are completely free and you can implement them right now! I’ve also included video footage of a few of these in action.

On the left is what appears when using Zoom by itself. The image on the right has improved webcam settings and a LUT applied in OBS.
1. Studio Lighting
Using bright and soft lights will allow your webcam to reproduce colors more accurately, provide a clearer image, and reduce graininess. Lighting is the most direct, but still the most overlooked factor in regards to image quality.
By soft light, I mean light that diffuses evenly so it does not cast harsh shadows or hot spots. I currently use an Elgato Ring Light (my review), but I’ve reviewed several other lighting kits on this site. Even if you only have access to a lamp, that will still boost your video’s appearance. Use what you have. And the rest of these tips you can do on a $0 budget.
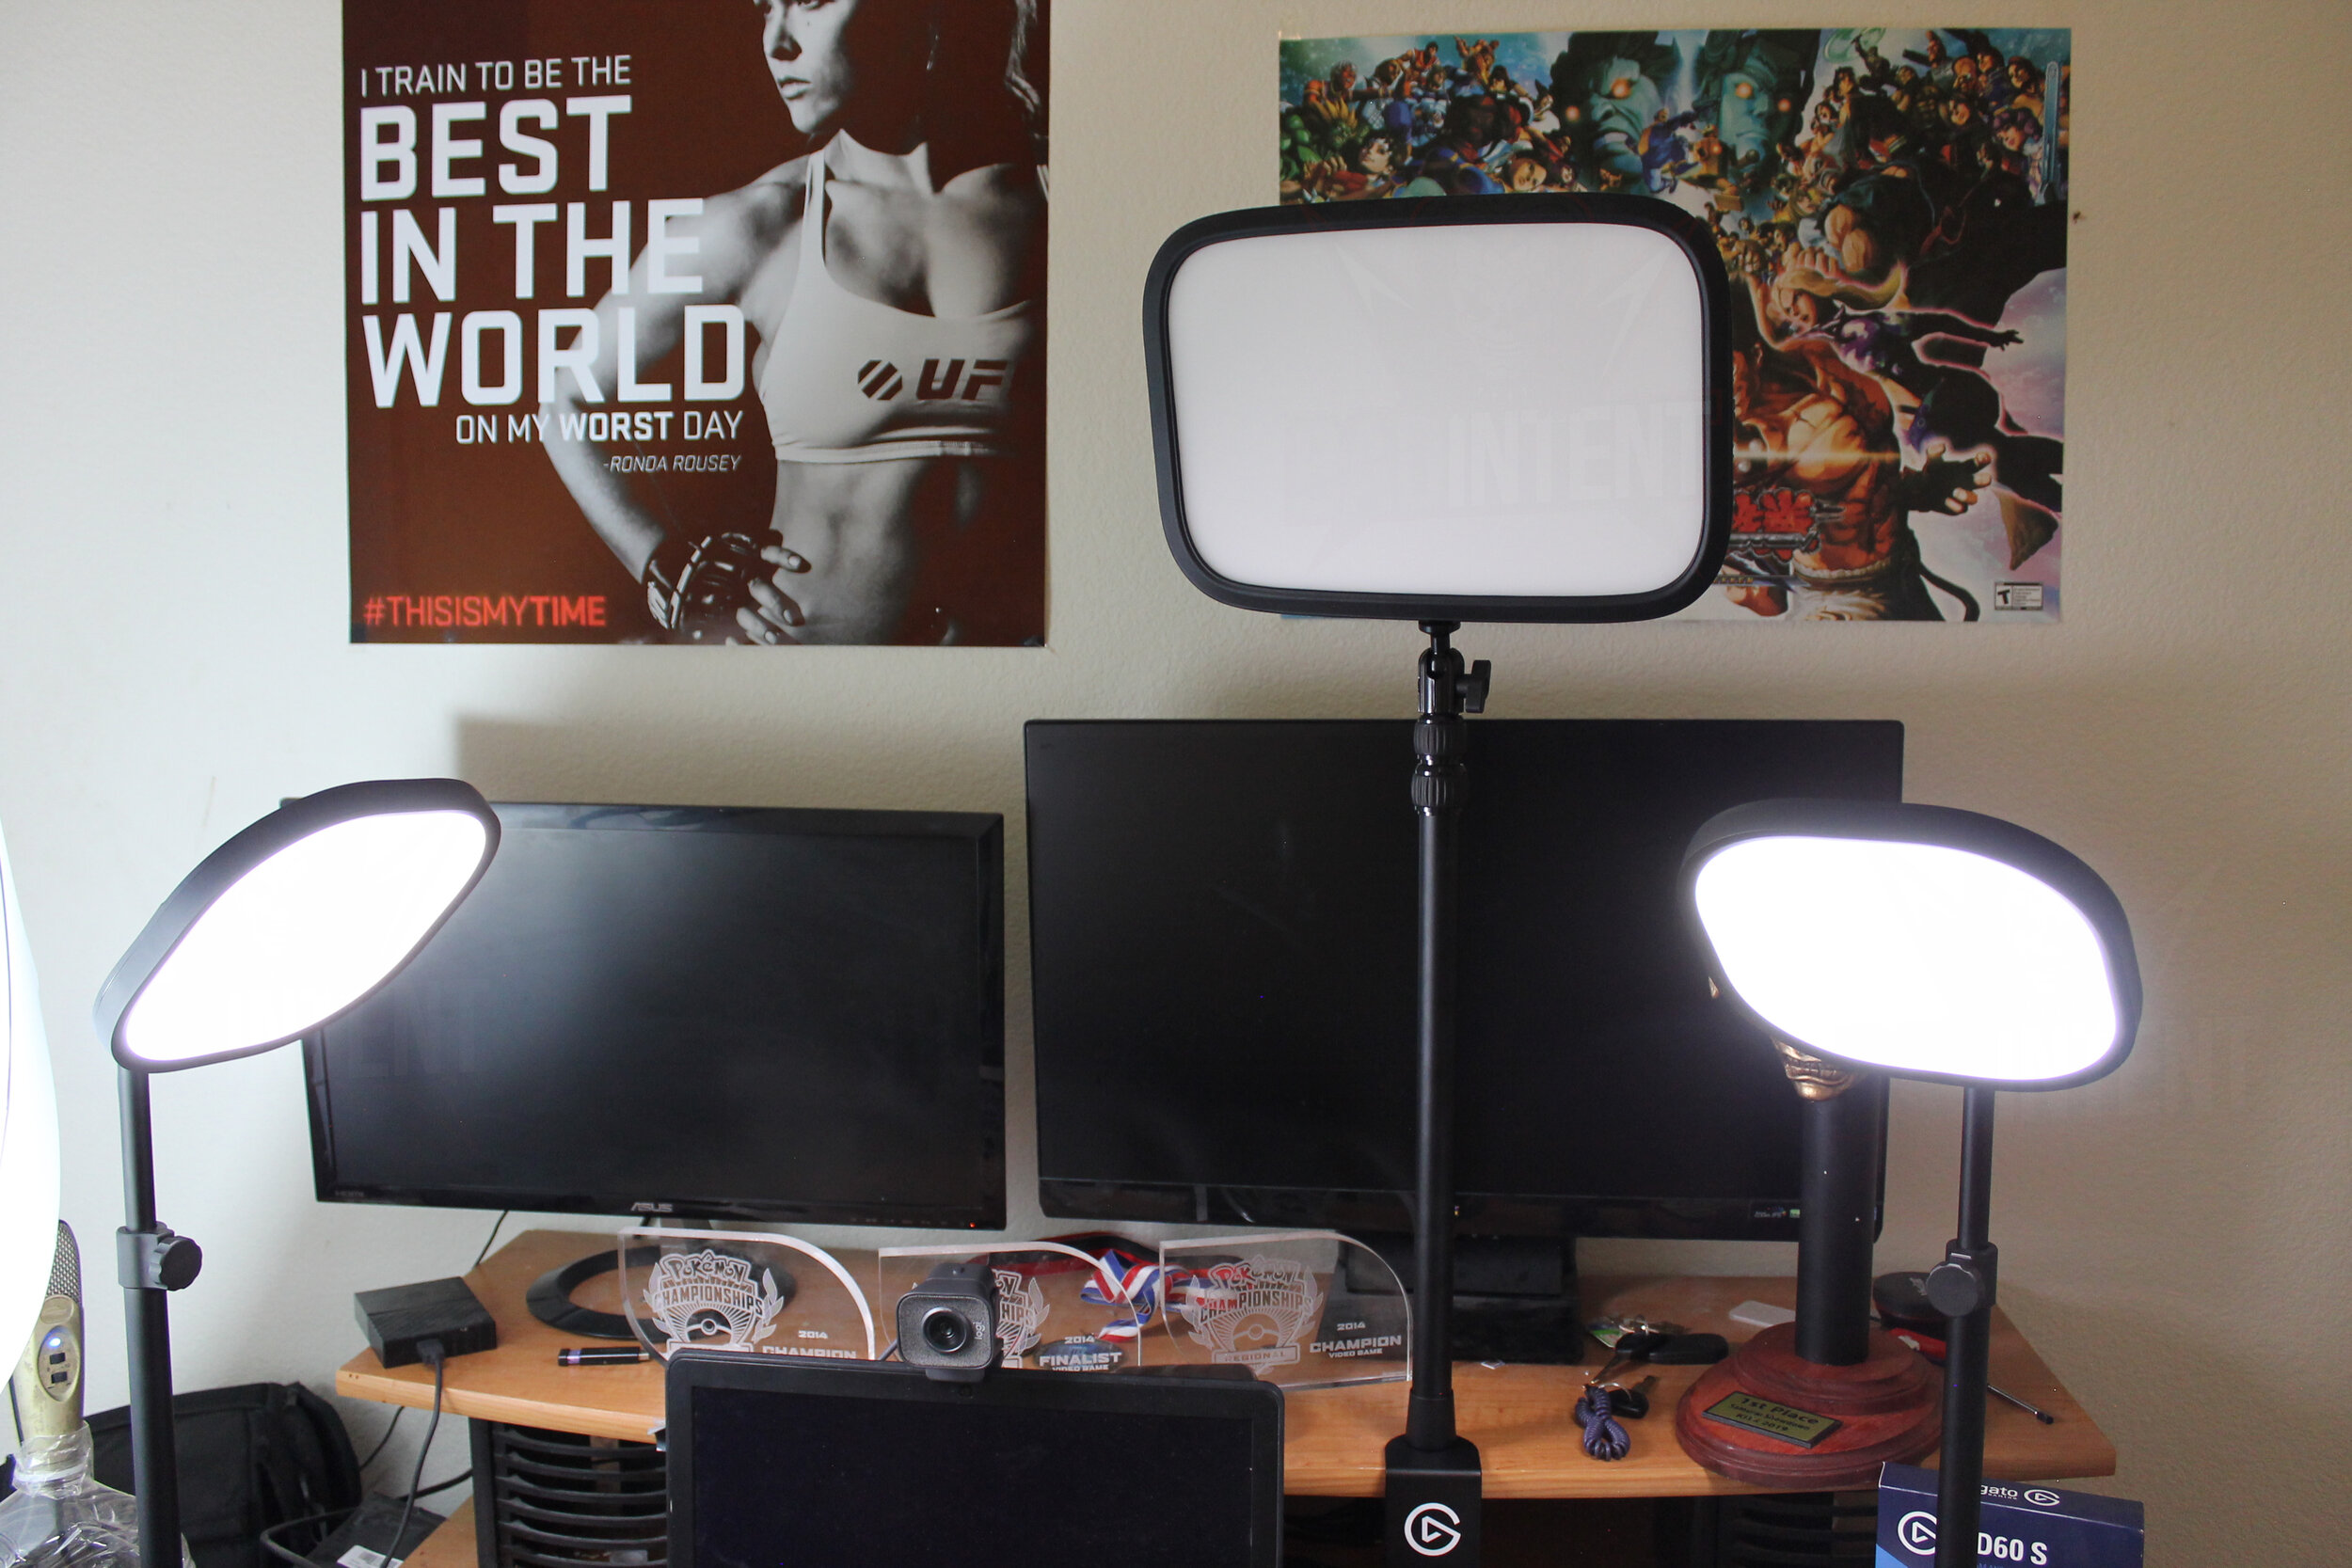
Two Elgato Key Light Airs and one Key Light in the middle.
Limostudio Umbrella Light Kit.
2. Sunlight

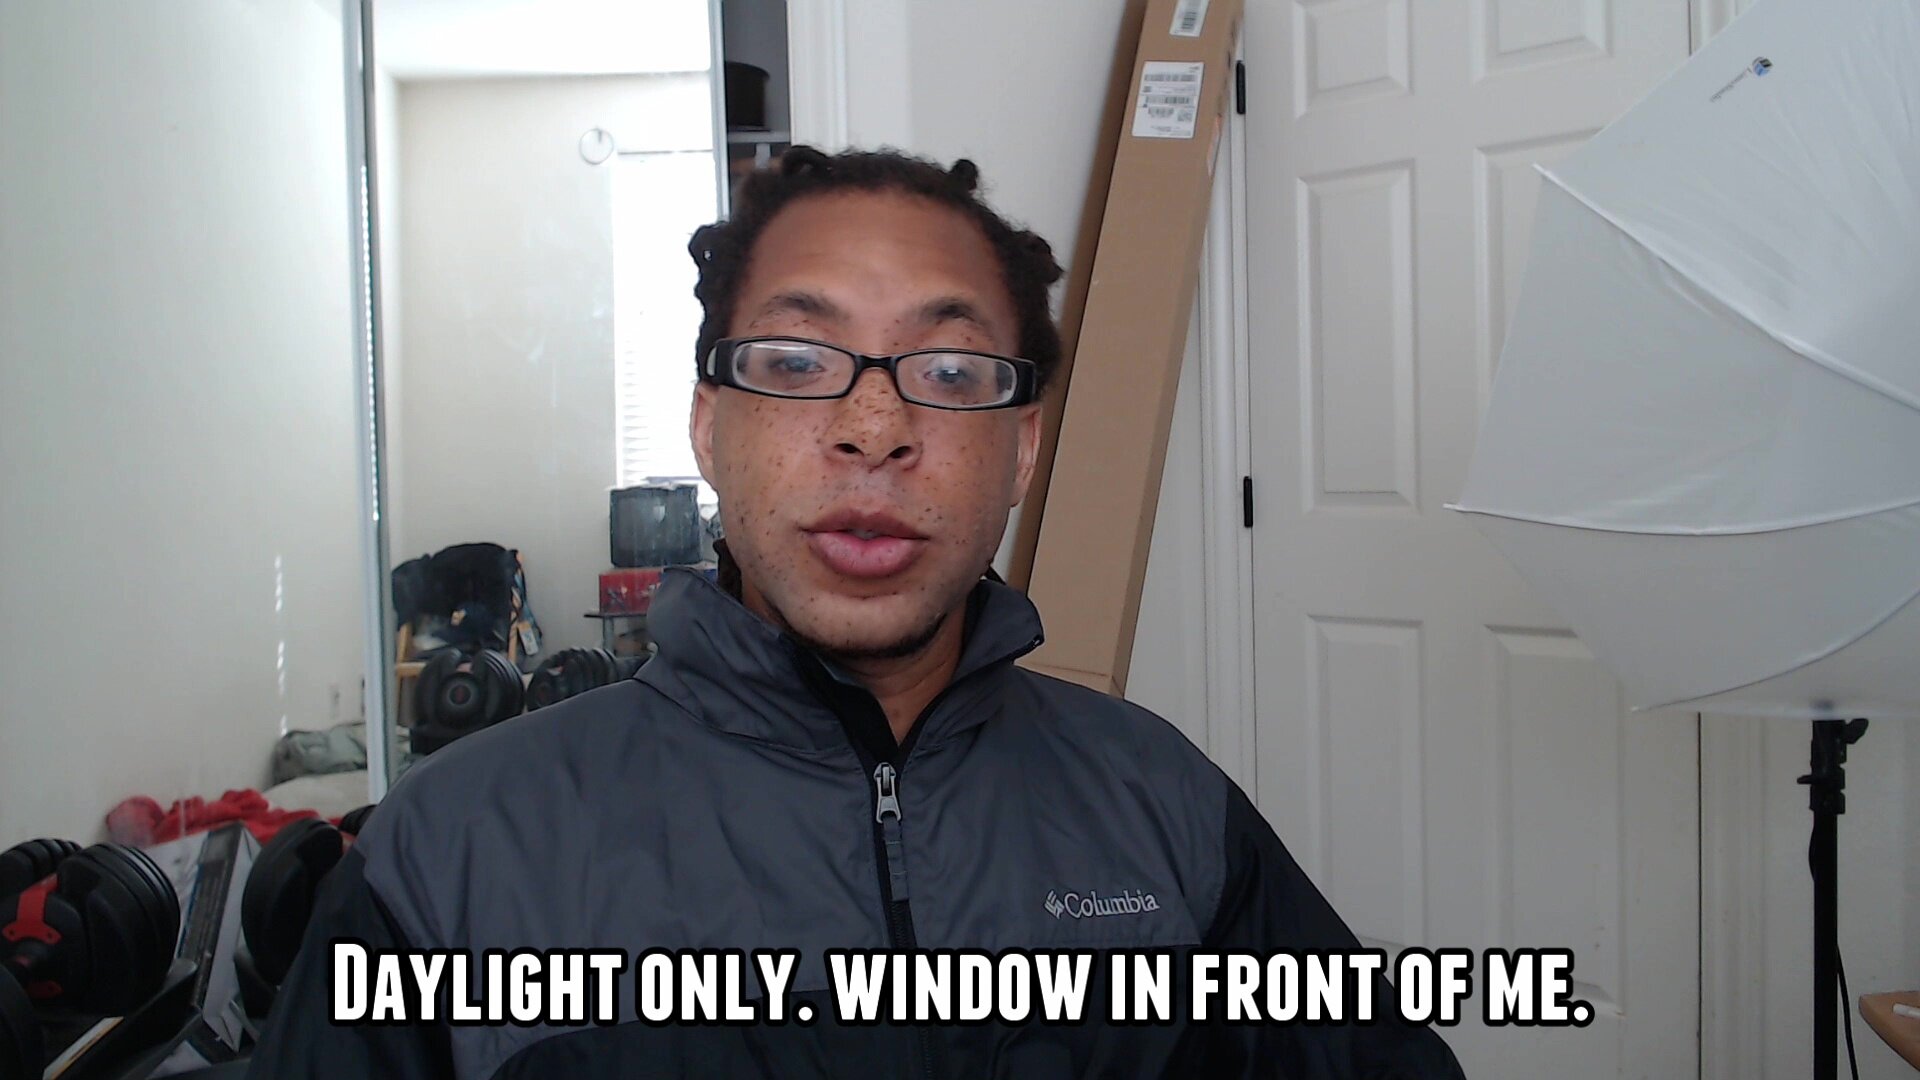
Recording outside in the sun, but you can just record facing a window.
Illuminate your shot with the sun. No really, the bright and even light provided by the sun puts artifical light to shame. Plus it’s free! If you don’t have the extra cash for a new lighting kit and a $1000 camera, you can take professional looking video and pictures with just your phone.
Even if you already have expensive lights, webcams benefit greatly shooting in the day time because concentrated studio lights can cause them to overexpose your subject and make the background super dark.
The sun brightens up the rest of your background to give your shot a much more even look. Remember that the sun’s color temperature and brightness changes throughout the day, so if your only source of light is the sun, trying to edit multiple shoots together into one video will lead to inconsistent lighting. Fortunately, my final tip can help mitigate that.
3. Lighting placement
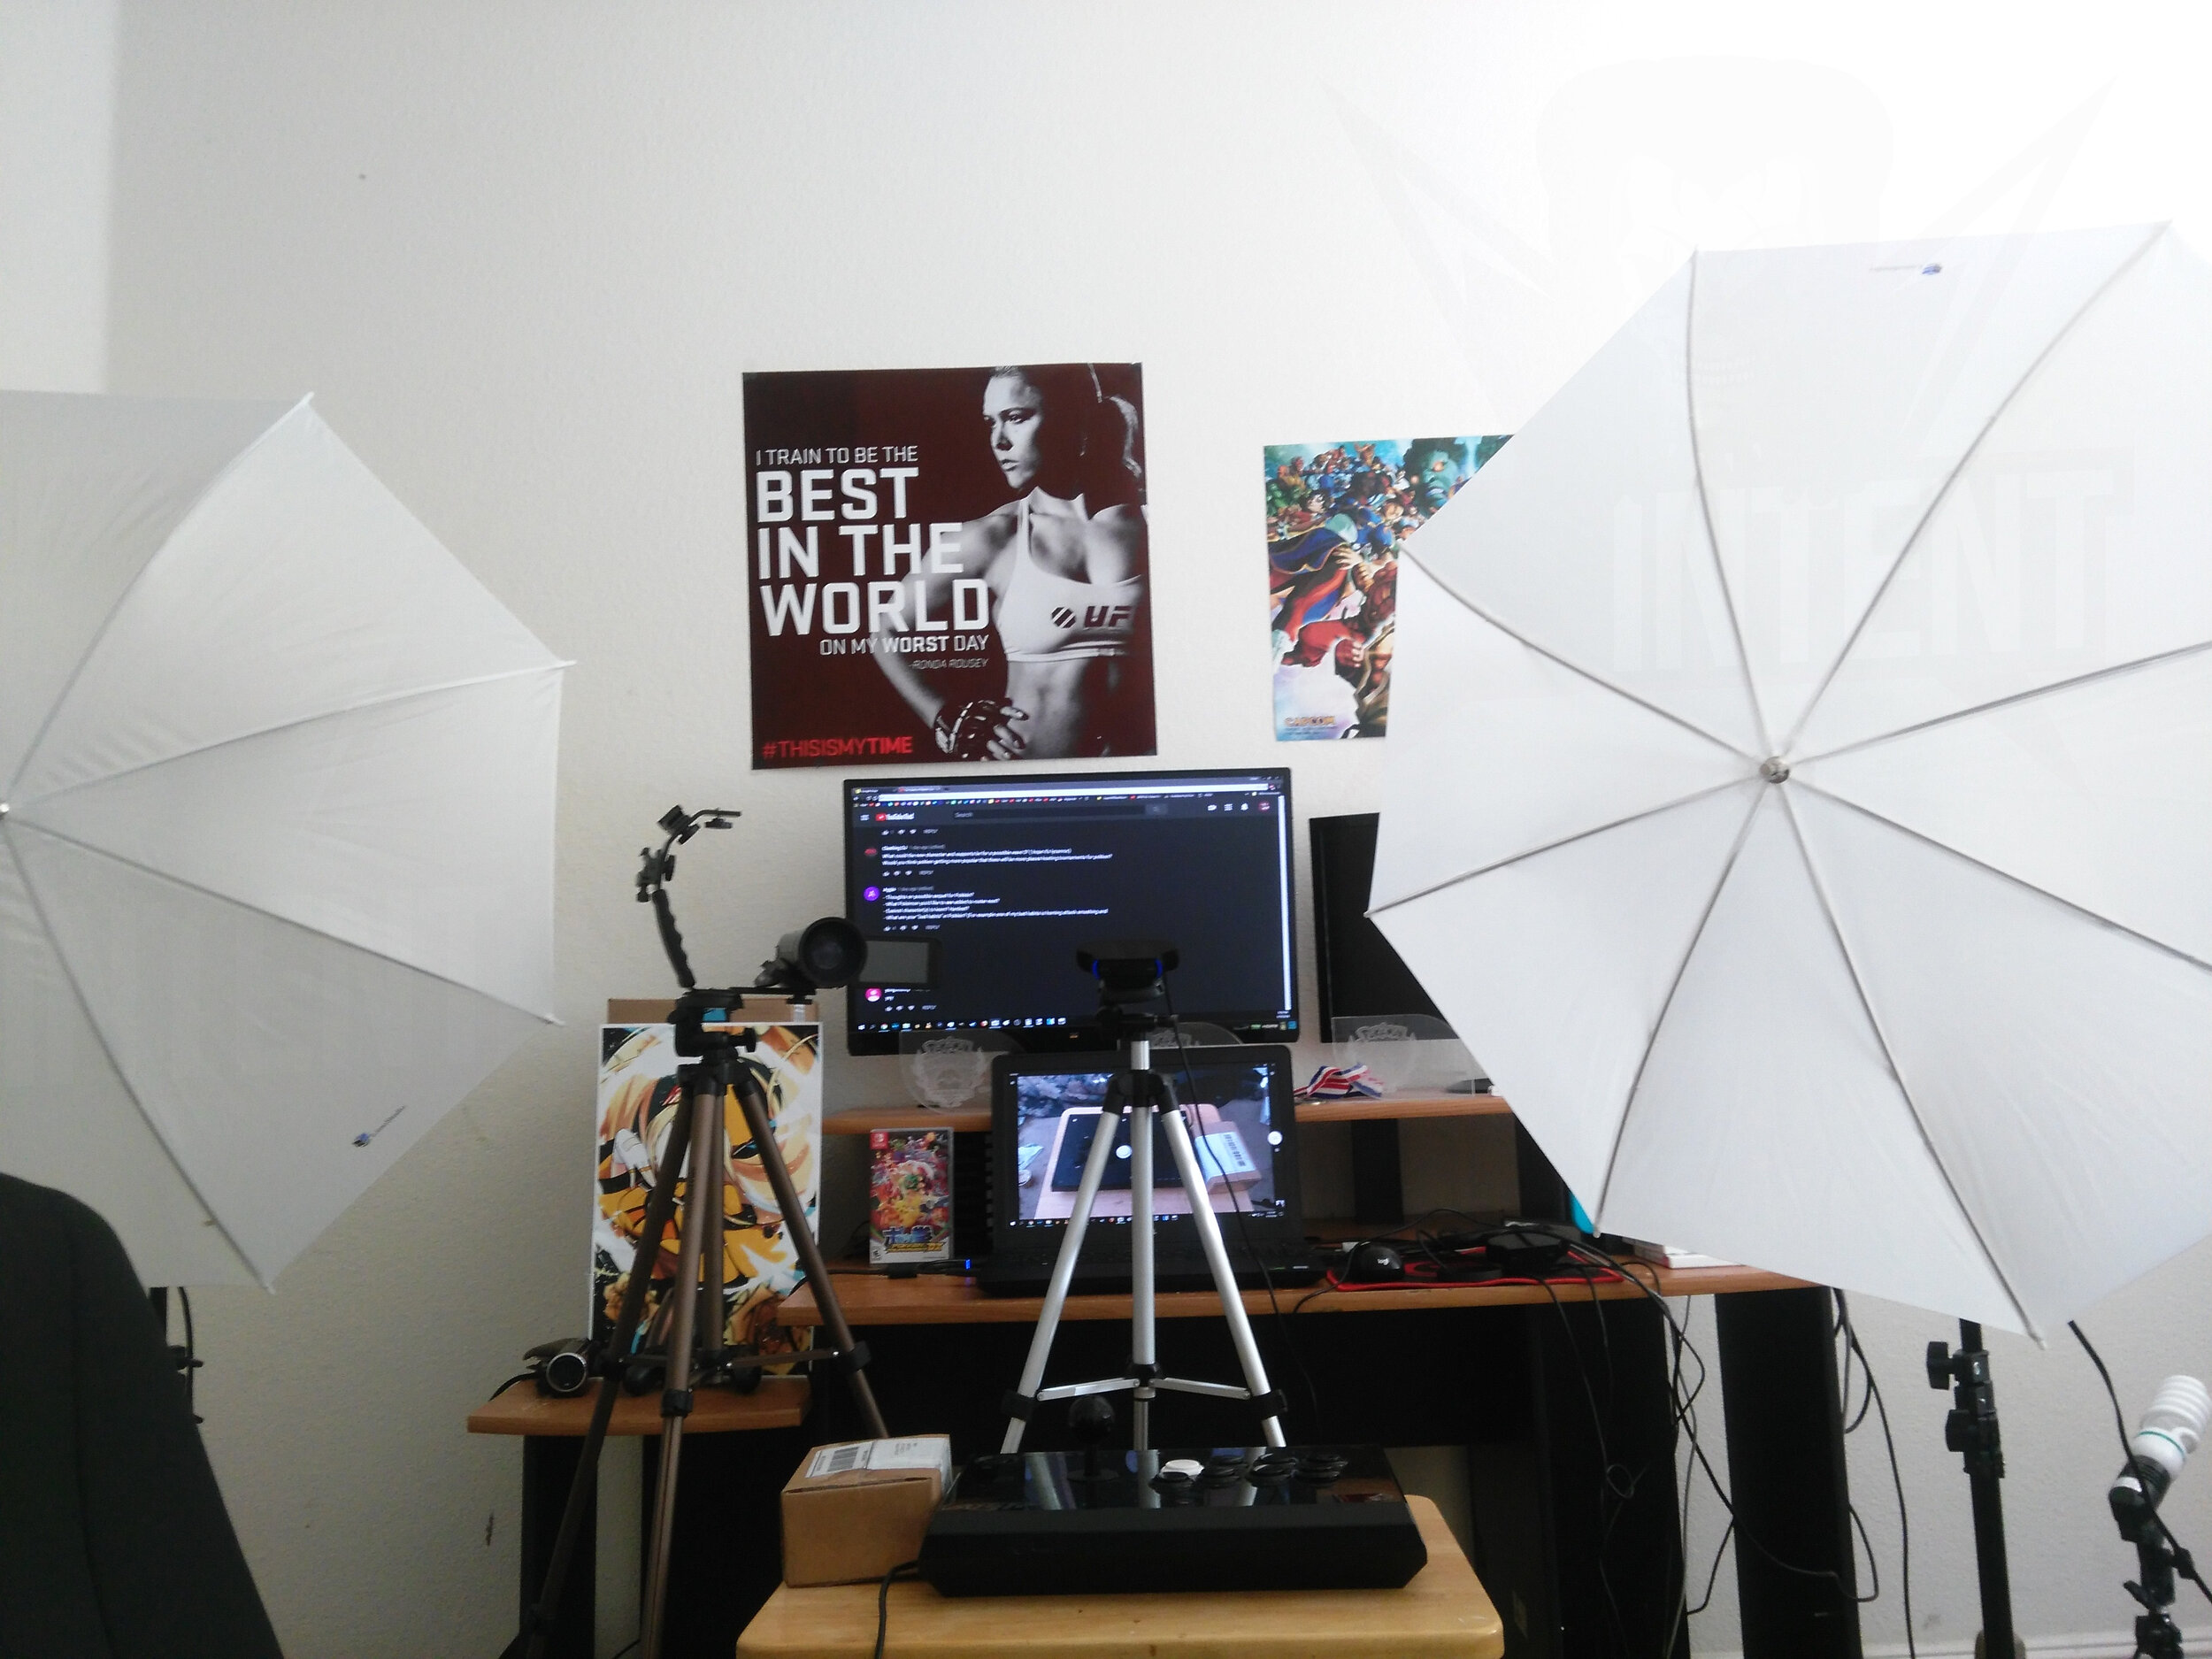
Unboxing my Elgato Ring Light.
Make sure your brightest light source is in front of you - not behind you or to the sides. Have you ever watched a video or taken a picture where the subject is super dark as if they were covered by a shadow even though the setting is blindingly bright? That’s because the subject themselves is casting the shadow themselves.
When you stand in front of a light source, your camera can only really do one of two things:
adjust the exposure for the bright light behind you - making you dark OR
expose for you, but causing the background to engulf the entire shot in a luminous spark.
Make sure the light source is facing the front of the subject. So if you’re using the light from the window, face the window. This is probably the number 1 lighting mistake made by new Twitch streamers and YouTubers.

Camera exposing for the background, making the subject too dark

Camera exposing for the subject, creating a cosmic halo
Just right! (minus the mess)
Power tip: At night, also consider using an extra light to illuminate your background. This helps webcams expose the entire shot properly without your face looking like it is glowing due more light being on it than everything around you. The background light doesn’t have to be super bright or expensive - it just needs to even out the shot.

Night time with two Elgato Key Light Airs

Night time with two Elgato Key Light Airs and back lights
4. Manual recording settings
Manually adjust your exposure, white balance and ISO/gain values. I’ll be demonstrating these settings in OBS. To use your webcam with these improved settings in Zoom or other streaming software, here’s my guide.
Even when your light is on point, automatic webcam settings don’t produce the greatest results. This is something you can fix in a few minutes with some basic tweaks. Whether you’re using the settings on your handheld camera or in streaming software like OBS, ditch as many automatic settings as you can. Autofocus is the only setting that might require some experience with before you take it off.
I have a quick OBS settings guide on this site to get you started, but here’s the short of it. The three settings to focus on at the start are exposure, ISO/gain, and white balance.
Exposure is how long the camera lets in light before producing an image. Increasing it will immediately make your image look brighter. Tick this up as high as you can without the frame rate dropping or the colors getting washed out.
Keep gain and ISO down as much as possible. These add grainy fuzz to your image. I also tend to leave the actual “brightness” setting alone as it’s really just a crude levels too in most Logitech webcams.
White balance will determine if the whites if your image look more blue or orange. Auto settings are a nightmare to deal with when editing because different parts of your video will be radically different colors even if you’re sitting in the same spot. Set it to manual and try to move the slider so that it looks how you see it in real life. If you have adjustable color temperature lights, you should change the temperature of the lights to what you want first and then set your white balance.
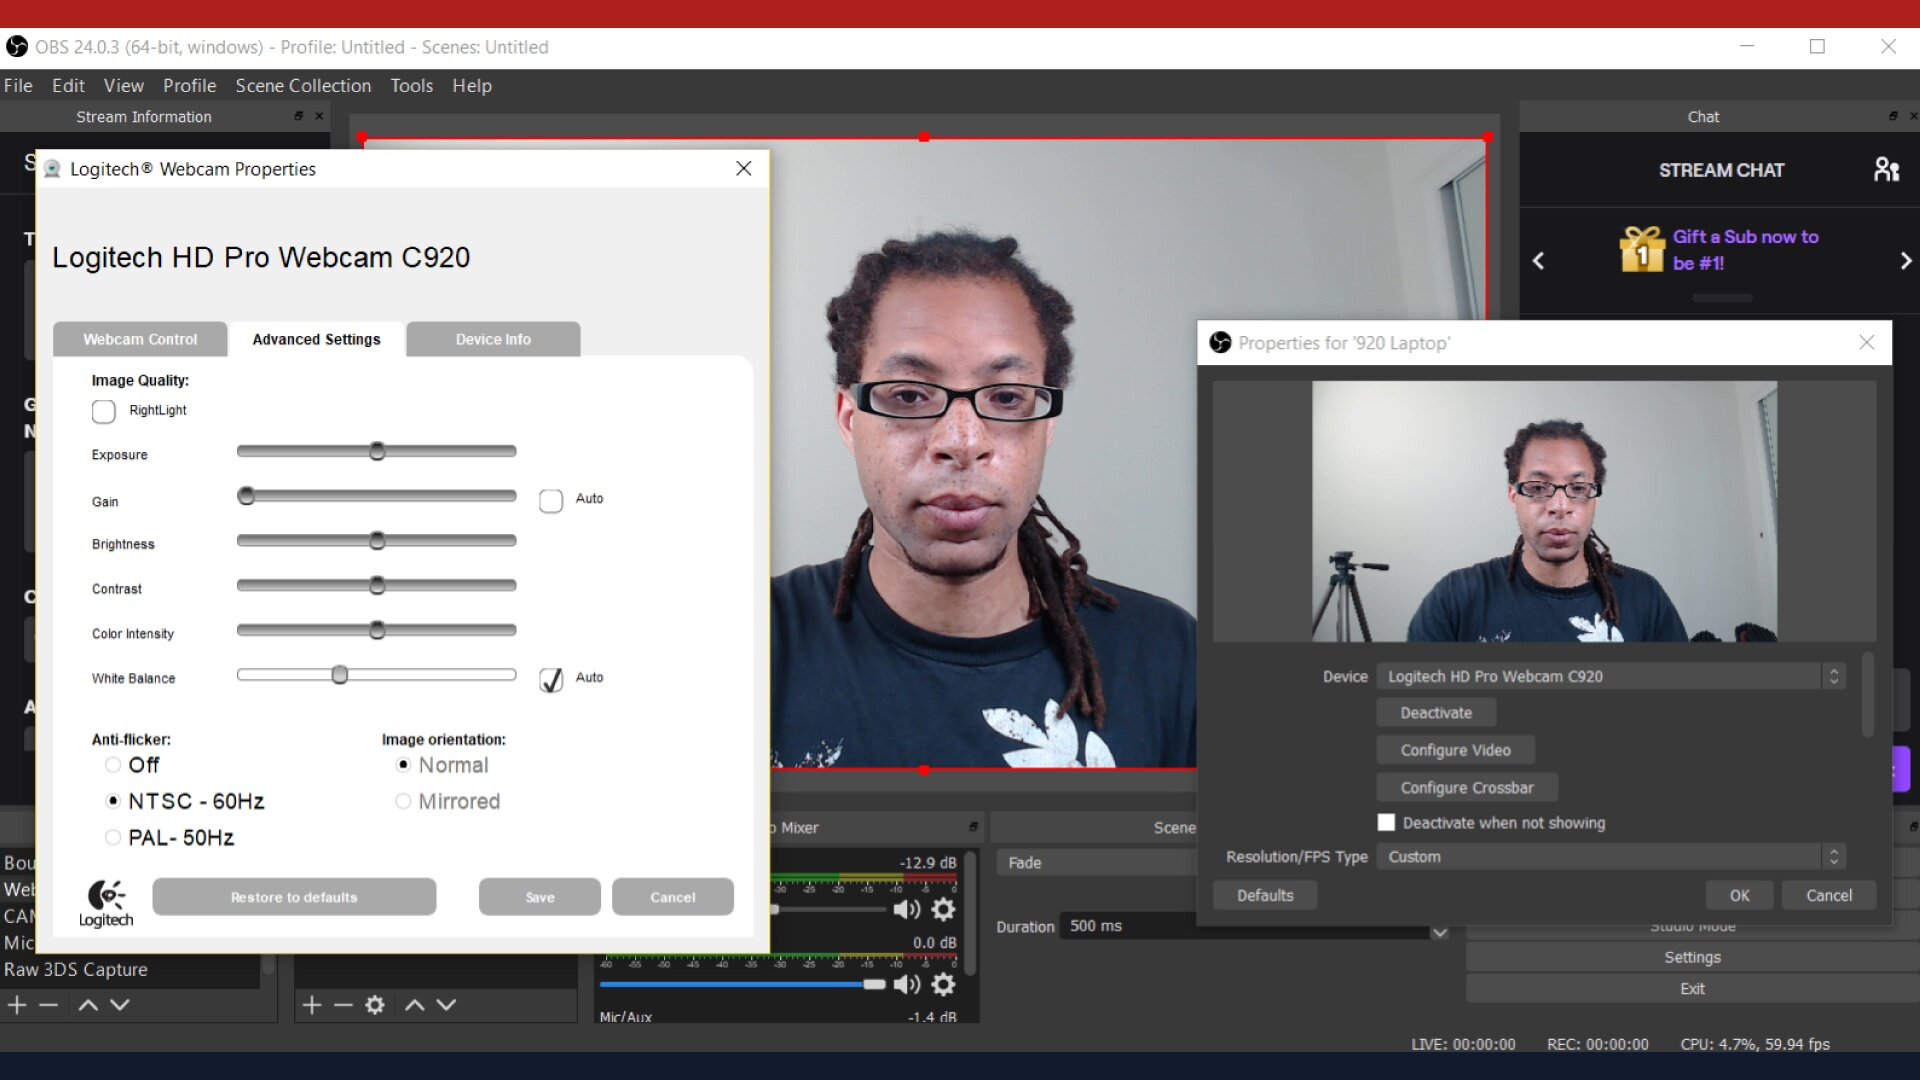
Example of the Logitech C920 camera settings in OBS
5. Look up Tables (LUTs)
Use Look Up Tables (LUTs) to color grade your image for you. Color grading is an alteration of an entire image’s color almost like a filter. I have a short guide on how to apply LUTs in OBS here.
There are lots of free LUTs on the web and the method to apply them in your video editing program will vary slightly. By finding the right ones baked into your video editor or by downloading ones you like, you can improve your image dramatically.
Even without LUT presets, you can manually edit the color temperature or brightness of an image in your video editor of choice. This is useful when your recording session with daylight spans different hours of the day and consequently different colors of light.
You can adjust the colors to be the same or just brighten up the shot overall. Again, remember to use this footage in Zoom, you’ll need OBS VirtualCam (my guide).
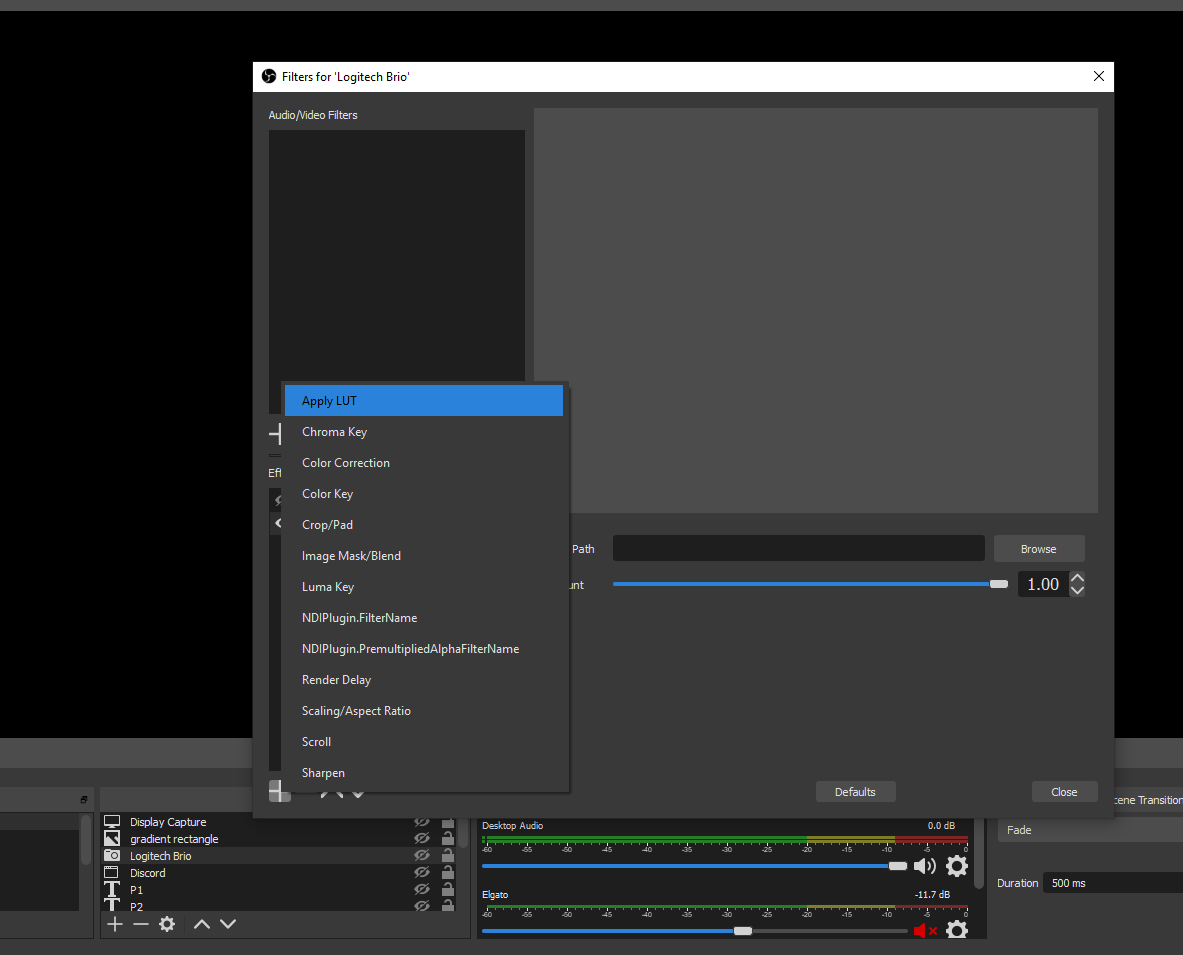
In OBS, right click your webcam, click filters then click the + sign on the bottom. Finally, click “Apply LUT”.

Example of a LUT off (left) vs on (right).

Footage straight from webcam

Color graded image with HDR effect added
These are two images from the same frame of a video. The first is straight from the camera and was darker than I wanted because of the time of day. In the second image I used a bright preset from Cyberlink Powerdirector to make the video pop a bit more and I added an HDR and sharpness effect to give slightly more definition to edges and shadows.
Summary
Here’s how to improve your webcam quality:
1. Use studio lighting like a ring light or LED panel. Even a lamp will help.
2. Use daylight as a light source.
3. Make sure you are facing your brightest light source.
4. Change your webcam’s settings manually.
5. Add LUTs to color grade your footage in real time.